Why Your Thanksgiving Pie Crust Turns Soggy (And How to Keep It Crisp)
You’ve made the filling, rolled out the dough, and baked your Thanksgiving pie until the top is beautifully golden. Then you cut the first slice and find a pale, gummy layer of pastry underneath.
A soggy bottom crust is one of the more disappointing pie-baking problems, especially when everything looks perfect from above.
It usually happens because moisture from the filling soaks into the dough before the bottom crust has time to bake properly. Sometimes the crust simply doesn’t get enough heat. Either way, there are a few reliable ways to prevent it, and the best approach depends on what kind of pie you’re making.
Why the Bottom Crust Gets Soggy
Pie dough contains flour, fat, and water. As it bakes, the moisture turns to steam, the fat melts, and the pastry develops its structure. With enough heat, the crust becomes firm, flaky, and golden.
But a wet filling can interfere with that process.
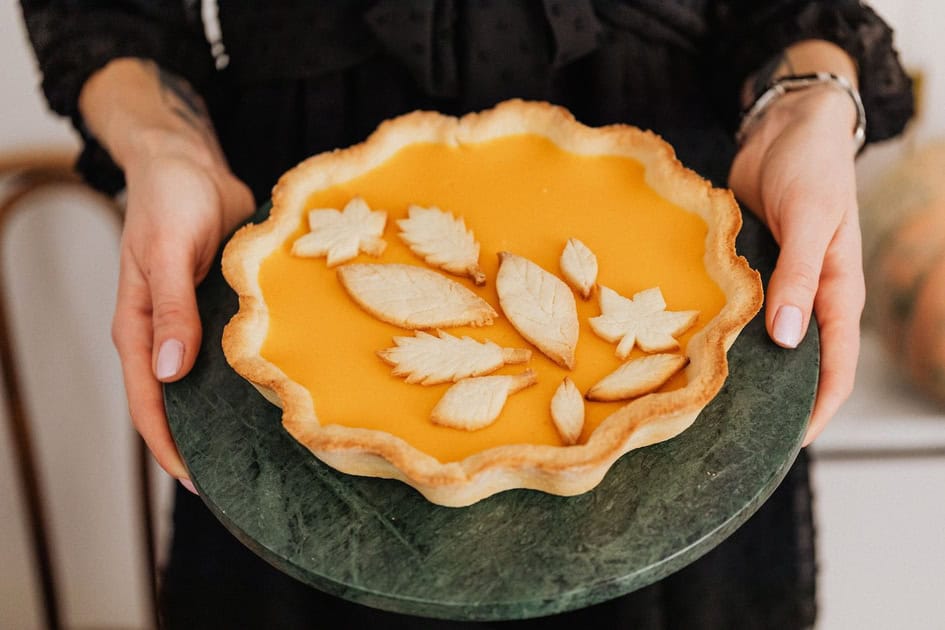
Pumpkin pie, for example, contains a relatively moist custard filling. By the time the custard has set, the pastry underneath may still be pale and soft.
Apple and berry pies present a different problem. As the fruit heats, it releases juice. If there’s too much liquid or the filling hasn’t cooked long enough to thicken, those juices can soak into the bottom crust.
The pie pan and oven temperature also matter. A crust that browns beautifully around the edges may not be getting enough heat underneath.
1. Give Pumpkin Pie Crust a Head Start
If you’re making pumpkin pie, one of the most effective ways to prevent a soggy bottom is to partially bake the empty crust before adding the filling.
Bakers call this blind baking.
The idea is simple: Give the pastry time to set and begin browning before it comes into contact with the wet custard.
Here’s how to do it:
- Roll out the dough, fit it into your pie plate, and shape the edges.
- Chill the prepared crust for about 30 minutes to help limit shrinking.
- Line the pastry with parchment paper or aluminum foil and fill it with pie weights or dried beans.
- Bake according to your pie-crust recipe, usually at a temperature between 375°F and 425°F.
- Remove the weights and lining as directed, then continue baking until the bottom begins to look dry and set.
The exact baking time depends on the recipe, pan, and oven temperature. Some pumpkin pie recipes call for a partially baked crust, while others use a fully baked shell or begin with raw pastry.
For the best results, use a pumpkin pie recipe designed for the crust preparation you’ve chosen.
A traditional double-crust apple pie generally doesn’t need blind baking. The unbaked top and bottom crusts are sealed together before the pie goes into the oven, so prebaking the bottom would complicate assembly.
King Arthur Baking offers a useful guide to preventing soggy pie crusts.
2. Pay Attention to Your Pie Pan
A pie plate isn’t just something to hold the filling. It affects how the pastry bakes.
Metal pans transfer heat efficiently and can help the bottom crust brown more readily. They’re a good choice if you regularly have trouble with underbaked pastry.
Glass pans have one useful advantage: You can look through the bottom to check whether the crust is browning. Ceramic pans can make excellent pies, too, although their thickness and heat-transfer properties vary.
If you already own a metal pie pan, try using it for your next fruit pie.
You can also improve bottom-crust browning by baking on a preheated metal baking sheet, provided your recipe allows it. The hot surface helps deliver heat to the bottom of the pan.
Be careful with glass bakeware. Putting a cold glass pie plate directly onto a hot baking stone, steel, or sheet can cause thermal shock and breakage. Follow the manufacturer’s instructions.
3. Try an Old Baker’s Trick: Crust Dust
If juicy fruit pies are your problem, a little flour and sugar sprinkled over the bottom crust may help.
This mixture is sometimes called crust dust.
Combine equal parts all-purpose flour and granulated sugar, then sprinkle a thin, even layer over the unbaked bottom crust before adding the fruit.
The mixture helps absorb some of the juices released during baking. You don’t need much; about 2 teaspoons total is a reasonable starting amount for a standard 9-inch pie.
King Arthur Baking describes how crust dust can help protect fruit-pie pastry.
Finely crushed cookies or dry cake crumbs can serve a similar purpose when their flavor complements the filling.
Keep the layer light. Too much flour can create a pasty layer between the fruit and pastry, which defeats the purpose.
4. Don’t Let Your Apple Pie Filling Get Too Juicy
Apples contain plenty of water, and some varieties release more liquid during baking than others.
That’s why most apple pie recipes include a thickener such as flour, cornstarch, or tapioca starch. As the filling cooks, the thickener helps turn the released juices into a sauce that stays with the fruit rather than flooding the bottom crust.
Follow the amount specified in your recipe. Adding extra thickener just in case can leave you with a gummy filling.
Some apple pie recipes also have you toss the sliced apples with sugar and let them stand before assembling the pie. The sugar draws moisture from the fruit. Depending on the recipe, you may drain off some of that liquid or cook it down into a syrup.
Don’t automatically pour every drop of accumulated juice into the crust unless the recipe calls for it.
For more apple pie inspiration, take a look at our award-winning apple pie recipes.
5. Make Sure the Bottom Crust Gets Enough Heat
It’s tempting to take a pie out of the oven as soon as the top turns golden. Unfortunately, that doesn’t mean the bottom is finished.
Baking on a lower oven rack can help the underside receive more heat, particularly with fruit pies. Follow your recipe’s recommended rack position and temperature.
For apple, cherry, and berry pies, watch the filling as well as the crust. Thick juices bubbling through the vents or lattice indicate that the filling has become hot enough for many common thickeners to work properly.
If the top is browning too quickly, cover it loosely with aluminum foil so the pie can continue baking without burning.
And remember that fruit pies often need more time in the oven than their appearance suggests. A golden top with an underbaked bottom is still an underbaked pie.
Which Method Works Best for Your Thanksgiving Pie?
Different fillings require different approaches.
| Pie | How to help keep the crust crisp |
|---|---|
| Pumpkin | Use a recipe that calls for a partially prebaked crust |
| Pecan | Consider a recipe with a prebaked crust and use a pan that promotes bottom browning |
| Apple | Thicken the filling properly and bake until the juices bubble |
| Cherry or berry | Use the recommended thickener and consider a light layer of crust dust |
| Chocolate cream or banana cream | Fully bake and cool the empty crust before adding the filling |
One important distinction: Cream pies filled after the crust has baked need a completely baked shell. Pumpkin and pecan pies, whose fillings bake in the oven, require different handling.
Let the Pie Cool Before Cutting It
If you’ve ever cut into a hot apple pie and watched the filling spill across the plate, you know how much liquid can remain inside a freshly baked pie.
Fruit fillings continue to set as they cool. Cutting too early can leave you with a runny slice and pastry sitting in a puddle of juice.
Many fruit pies need several hours of cooling before they can be sliced neatly. Follow the recipe rather than guessing.
Place the pie on a wire rack so air can circulate beneath the pan as it cools.
Pumpkin, pecan, and other pies containing perishable egg- or dairy-based fillings need more careful handling. Refrigerate them within two hours after baking, following USDA food-safety guidance.
Can You Save a Pie That Already Has a Soggy Bottom?
If the crust is simply a little soft, reheating a fully baked fruit pie in the oven may help improve its texture. It won’t necessarily restore the flakiness of a properly baked crust, but it can make the pastry more pleasant to eat.
Avoid using the microwave if crispness is your goal. Microwaving warms the filling without browning the pastry.
If you’re still baking and notice that the bottom crust needs more time, you may be able to continue cooking the pie while shielding the top from excessive browning. This works best with fruit pies that can tolerate additional oven time.
Once a custard pie has finished baking and cooled, however, returning it to the oven can overcook the filling without doing much for the bottom crust.
For your Thanksgiving pies, the most useful changes happen before the filling goes in: Choose an appropriate pan, manage excess moisture, and give the crust the baking time it needs.

- Maggie Konrad

- Maggie Konrad
- Maggie Konrad
- Maggie Konrad