

How To Grow Hops At Home: A Beginner’s Guide From Rhizome To Harvest
Give your homebrew a special homegrown touch by growing your own hops! You don't need a lot of space or a master green thumb. Here are the easy tips.
Quick Reference
- Plant name: Humulus lupulus, or “little wolf,” a hardy perennial vine (bine).
- When to plant: Spring, after your last frost date, once soil is workable.
- Sun: 6 to 8 hours of direct sun, ideally southern exposure.
- Soil: Loose, well-drained, pH 6.0 to 8.0, fed with bone meal or organic compost.
- Support: Trellis, pole, or fence. Dwarf varieties reach 8 to 10 feet; standard reach 20+.
- Harvest: Late summer; expect half a pound to two pounds of dried hops per plant after year one.
- Storage: Vacuum-sealed hops last up to two years frozen, six months refrigerated.
- Dog warning: Hops are toxic to dogs; keep them away from your growing area and brewing scraps.
Home brewing took off during the pandemic and never really slowed down. The American Homebrewers Association counts more than a million active homebrewers in the United States, and a fair share of them are chasing the same question: can you grow your own hops? The short answer is yes. You do not need a big yard, a farm background, or an expensive setup. You need vertical space, six good hours of sun, and one spring afternoon to get a rhizome in the ground. Whether you brew IPAs, want a fast-growing shade vine for the porch, or just like the sleep-aiding scent of dried cones, this guide walks you through the whole cycle from rhizome to freezer.
What Are Hops?
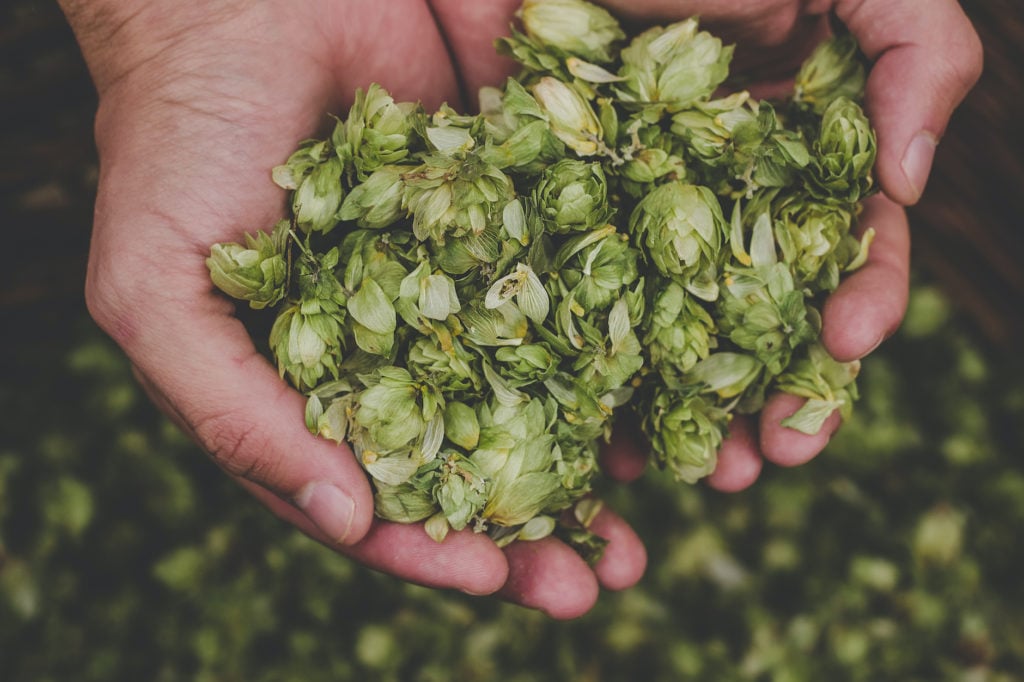
Hops are the papery, pinecone-shaped flowers of the Humulus lupulus plant, a hardy climbing perennial in the same family as cannabis. Early brewers added them for their natural antibacterial power, which kept beer from spoiling on long shipments. Today the reason is flavor. Those cones deliver the bitter bite, the citrus snap, the piney nose, and the floral finish that give beer its personality. Strip the hops out and beer flattens into something dull and slightly sweet.
Hops also have a long medicinal history in Europe and among Native American peoples. Many who struggle with insomnia buy dried cones to tuck into a sachet or dream pillow. The folklore has roots in observation: field workers who harvested hops kept dozing off on the job, which pushed researchers to look closer. According to the Mount Sinai health library, hops appear to raise GABA activity in the brain, the same neurotransmitter that quiets the central nervous system, softens anxiety, and settles racing thoughts. Even sniffing a handful of dried cones can help.
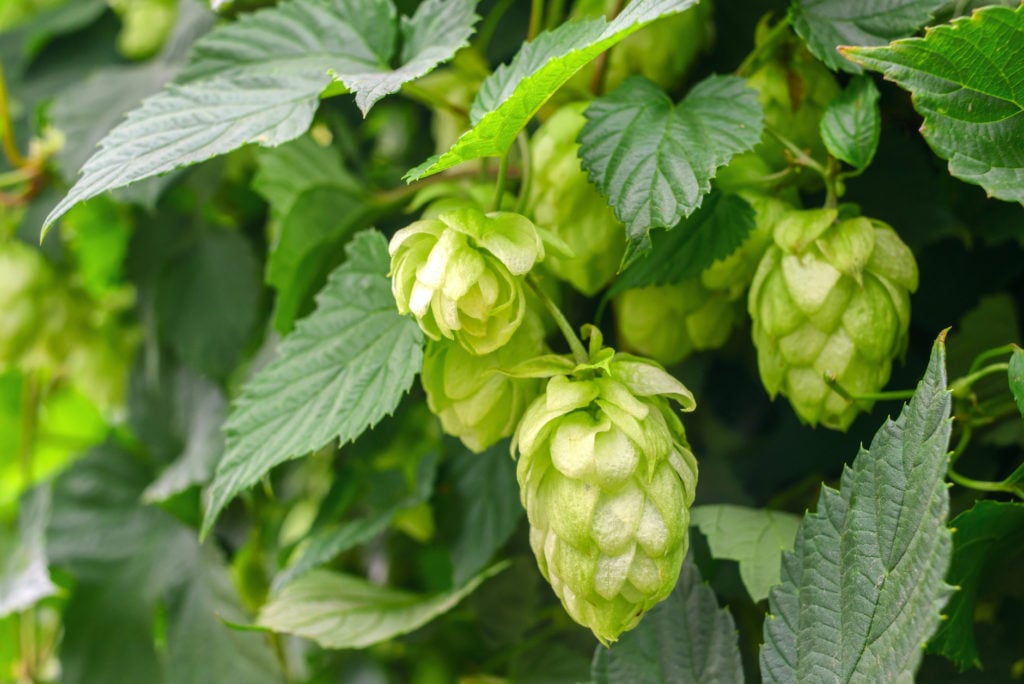
The Latin name Humulus lupulus translates to “little wolf,” a nod to how the vine strangles anything nearby if left unchecked. Hops climb on bines (a vine that wraps around a support rather than clinging with tendrils), and they do not need much horizontal space. If you have room to grow up, you have room to grow hops. That vertical growth habit makes them ideal for small backyards, side-yard fences, and even large deck containers.

How To Grow Hops
Before the first rhizome hits soil, you have three decisions to make: which variety to plant, when your growing season allows you to plant it, and whether you start from rhizome, crown, or seed.
First, Choose Your Variety
There are more than 120 hop varieties on the commercial market, which is enough to overwhelm anyone. For brewing purposes, they sort into three buckets.
Bittering hops: The bite you taste in an IPA comes from bittering hops. The alpha acids in the cones turn bitter when boiled, so brewers add these hops during the final 15 to 20 minutes of the boil. The longer the boil, the more bitter the beer. Bittering varieties are common in India Pale Ales but show up across styles, adding grassy, floral, and citrusy notes.
Aroma hops: Aroma hops go in during the last five minutes of the boil, or at “flame out” when the kettle comes off the heat. Brewers call them “finishing hops” for that reason. They add scent and top-note flavor without much bitterness.
Dual-purpose hops: As the name says, some varieties can pull double duty for bittering, flavoring, and finishing.
If you are planting hops for shade or decoration, any variety will do. If you are planting for the kettle, match the variety to your climate and to the beer you want to make. Talk to other growers, your local agriculture extension, or a small brewery near you (many home brew forums are active by region) to learn what actually thrives in your soil.
How’s Your Growing Season?
Hops are hardy in USDA zones 3 through 8, which covers most of the continental United States and much of southern Canada. In a shorter-season region like the Almanac’s home state of Maine (zones 3 to 5), pick a variety that matures quickly enough to finish before the first frost. The most popular varieties on the market are Cascade and Centennial (ranked number one and two respectively), followed by Chinook, Simcoe, Citra, Columbus, Mosaic, Crystal, Galaxy, Comet, Fuggle, Magnum, U.S. Goldings, Willamette, and Zeus.
Regional Planting Windows for Hops
| Region | Average last spring frost | When to plant rhizomes |
|---|---|---|
| Deep South and Gulf Coast | Late February into March | February into March |
| Mid-South and Southern Plains | Mid to late March | March |
| Mid-Atlantic and Ohio Valley | Mid to late April | Late March into April |
| Midwest and Great Lakes | Early to mid May | April into early May |
| Northeast and New England | Mid to late May | Late April into May |
| Mountain West and Pacific Northwest | Mid May into early June | Late April into May |
Seeds, Rhizomes, or Plants: Which Should You Grow?
Hop plants are hardy perennials. Once established, they come back on their own every spring and can produce for 20 years or more. They grow from rhizomes, the underground roots that spread and send up side shoots. The mature plant, called a “crown,” is what produces the cones you harvest. Both rhizomes and crowns can be ordered online, or you can check specialty garden shops, local hop farmers, or home brewing stores for availability. Rhizomes cost less than crowns, and either option beats trying to start hops from seed, which rarely produces true-to-type plants.
Plants and rhizomes are only sold in early spring, when hop farmers dig up sections of their fields to sell. Once your rhizome arrives, store it right until planting day. Wrap the cut root in a moist paper towel, place it in an airtight container or a Ziploc bag, and keep it in the fridge. Moist, not wet, or mold will set in. Re-dampen the towel as needed. Hops are resilient, but wait until your last frost has passed and the soil is workable before planting.
Check our Average Frost Dates for your region here.
Proper Growing Conditions
Sun: Hops want a minimum of 6 to 8 hours of direct sunlight per day, and southern exposure is best. A shady site produces spindly bines and few cones.
Soil: Well-drained soil is non-negotiable. Hops love water but hate wet feet, so keep them away from low spots where standing water collects. Loose, weed-free soil that drains after a rain is the target.
Fertilizer: Feed the planting hole with bone meal, blood meal, or a rich organic compost worked at least twelve inches down. You can test your soil to confirm a neutral pH between 6.0 and 8.0. Hops are strong feeders, especially in containers, so give them regular top-ups high in nitrogen and potassium and low in phosphorus.
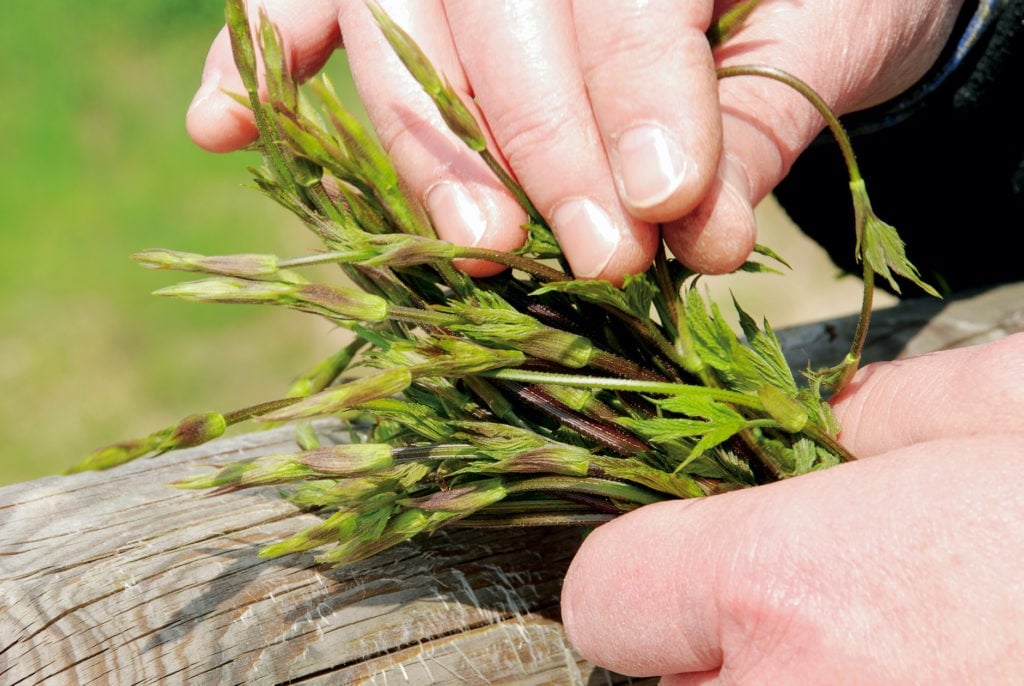
Space: Give the bines something tall to climb. A trellis, a garden pole, or a run of twine anchored to the eaves all work. Once the shoots break the surface, train them by wrapping the first two feet clockwise around the support. After a few days they take over on their own and start throwing lateral side shoots.
Containers: Hops can grow in large containers if you pick a dwarf variety (Cascade, Centennial, Galena, or U.S. Goldings) that maxes out at 8 to 10 feet. Short on vertical room? They will also run horizontally along a fence line. The taller the trellis, the bigger the eventual harvest.
Planting: Mound the soil at each planting site and dig a hole about 4 inches deep in the mound. Space plants about 3 feet apart so the roots have room. Lay the rhizome flat in the hole, root side down.
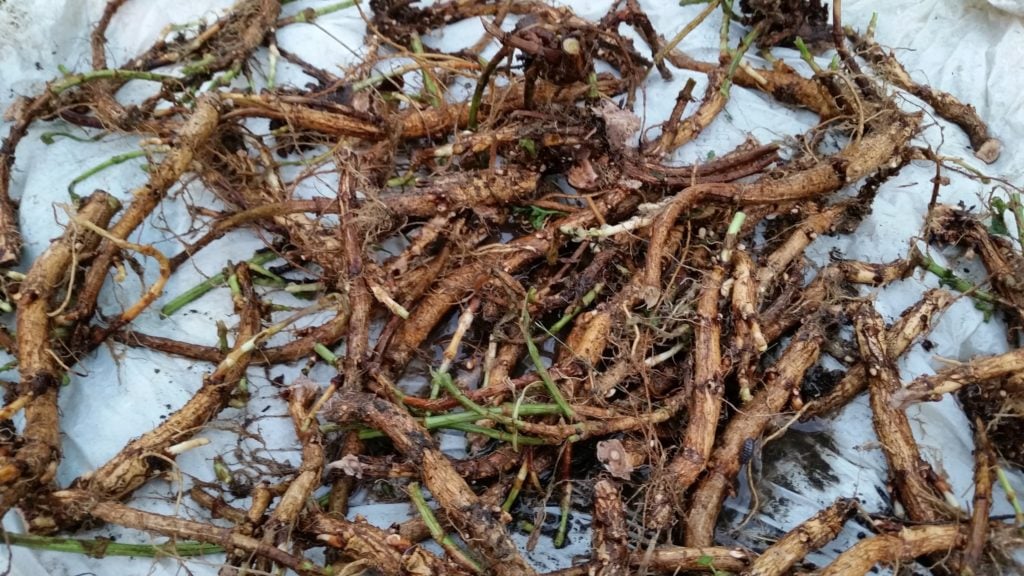
For an established crown, dig a hole several times wider than the root ball and mix organic compost into the backfill. Keep the soil moist (not drenched) until the vines sprout, then water frequently through late spring and early summer. Expect 4 to 6 bines per plant.
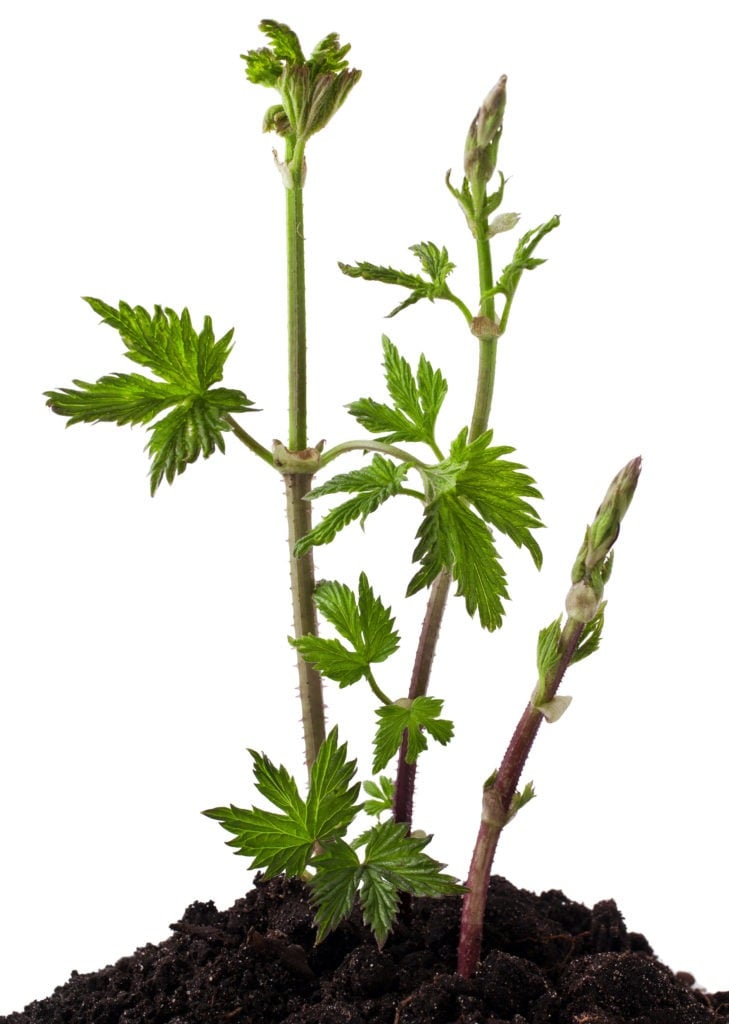
Mulch: Pack the soil loosely over the planting mound and cover with straw or organic mulch to hold moisture and block weeds.
Weeding: Keep the surrounding area clear and pinch off any damaged shoots. A few months in, trim the leaves off the bottom two feet of each bine to keep disease and fungus from splashing up during rain.
Which is better for home brewing, pellet hops or whole hops?
Harvesting Hops
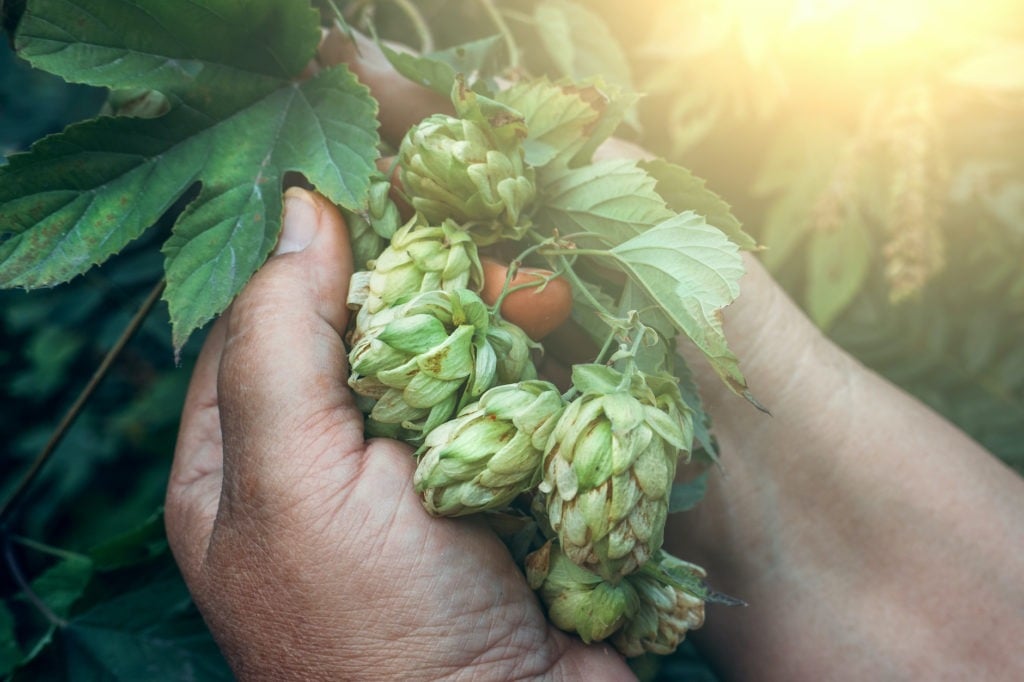
Your hops are ready to harvest in late summer, and the exact date depends on your location and this year’s weather. Use the squeeze test: a ripe cone feels papery, gives slightly when pressed, and springs back. Color shifts from deep green to a lighter, drier green. Rub a ripe cone between your fingers and you should smell strong notes that many growers describe as cut grass and onion, sometimes with a citrus tail. If the taller bines are out of reach, gently lower the whole run and lay it flat on the ground before picking. Twist each ripe cone off the bine.
Do not expect a big harvest the first year. The plant spends most of its first season building crown and root, not cones. From year two on, plan on half a pound to two pounds of dried hops per plant. When the season ends, cut the bines down to an inch above the ground and cover with mulch for next spring.
Drying And Storing Your Hops
Once picked, hops need to dry fast without cooking. A food dehydrator on its lowest setting works well, or you can set your oven to its lowest temperature (140 degrees or under) and spread the cones on a sheet pan, checking every 20 minutes. They are done when the inner stem is brittle and snaps cleanly rather than bending, and the outer petals flake off with light pressure.
Once dried, freezing is the simplest way to preserve them. Divide the harvest into one- or two-ounce packages so a single portion is enough for one brew day. Freezer bags, food-saver bags, or airtight jars all work, and you want to squeeze out as much air as possible. A vacuum sealer is even better. Vacuum-sealed whole dry hops last up to two years in the freezer and six months in the refrigerator. Label every package with the harvest date and variety.
When brew day comes, your home-grown hops will be ready to go.
Interested in brewing your own beer at home? Check out our Best Days To Brew Beer planner and time your first batch by the moon.
Important note for dog owners: Hops are toxic to dogs. Ingesting even a small handful of raw or spent hops can cause malignant hyperthermia, a life-threatening spike in body temperature. If you are growing hops and share your yard with a dog, fence off the growing area and dispose of spent brewing hops in a sealed bin. If your dog gets into them, call your vet or the ASPCA Animal Poison Control Center right away.
A Quick History Of Hops In North America
Hops were first cultivated in the American colonies in the 1600s, and by the 1800s New York state was the country’s hop-growing capital. Powdery mildew and Prohibition eventually pushed the industry west, and today more than 96 percent of United States hop acreage is in Washington, Oregon, and Idaho, according to the USDA National Agricultural Statistics Service. The Yakima Valley alone produces roughly 75 percent of the American crop. That is worth knowing as a home grower: the varieties you see in commercial beer were bred for a hot, dry, long-day valley, so a Cascade rhizome in your Ohio backyard will not behave exactly the way it does on a Washington farm. It will still make cones, and it will still make good beer.

FAQ: Growing Hops At Home
How long does it take to grow hops from a rhizome?
You will see shoots in 2 to 3 weeks after planting, and mature bines in a single season. Cone production, however, is a two-year story. The first year the plant is building crown and root, so expect a small harvest at best. From year two on, a healthy plant delivers a half pound to two pounds of dried hops a season.
Can you grow hops in a container or a small yard?
Yes. Pick a dwarf variety like Cascade, Centennial, Galena, or U.S. Goldings that tops out around 8 to 10 feet, use a container at least 20 gallons, and give it a sturdy trellis. A south-facing fence is a good horizontal alternative if you cannot go vertical.
Which hop varieties are easiest for beginners?
Cascade and Centennial are the two most-planted home-grower varieties in the country for a reason. Both are vigorous, disease-resistant, and dual-purpose, so you can bitter or aroma with the same harvest. Chinook and Nugget are also forgiving. Your local agricultural extension can tell you what performs in your zone.
How much sun and space do hops actually need?
A minimum of 6 to 8 hours of direct sun, ideally with southern exposure, and at least 20 feet of vertical clearance for standard varieties (10 to 12 feet for dwarfs). Plants go in 3 feet apart. That is enough clearance for a backyard pole trellis or a run of twine off a garage eave.
When are hops ready to harvest?
Late summer to early fall, depending on variety and region. A ripe cone is dry and papery, feels lighter than it looks, springs back after a gentle squeeze, and smells strongly of cut grass, onion, and (variety depending) citrus or pine. If in doubt, split one open: yellow lupulin powder inside means it is ready.
Are hops safe around pets?
Hops are toxic to dogs, especially spent brewing hops. Ingestion can cause malignant hyperthermia, which is life-threatening. Cats and rabbits should also be kept away. Fence your growing area, seal spent hops in the trash, and call your vet or the ASPCA Poison Control line if a pet gets into them.
How long do dried hops keep?
Vacuum-sealed whole dried hops last up to two years in the freezer and about six months in the refrigerator. Label each bag with variety and harvest date. Loose bags with air in them lose alpha acid faster and can turn cheesy.


Natalie LaVolpe
Natalie LaVolpe is a freelance writer and former special education teacher. She is dedicated to healthy living through body and mind. She currently resides on Long Island, New York, with her husband, children, and dog.
- Natalie LaVolpe

- Natalie LaVolpe
- Natalie LaVolpe
- Natalie LaVolpe



Interesting! Thank you for your interest! Thank you for the information you have shared in this content.the formation you have shared in this content.