Starting Seeds Indoors
If you're anxious to get outside in the garden, but the temperatures are still too cold, why not go ahead and start seeds indoors?
Now is the time when many of us are thinking about our spring gardens. No matter if you want to plant flowers or grow your own food, you need to know how to get started. And the best part is, it’s easy — and it all starts a few seeds, some basics, and a little TLC.
What You Will Need To Start Seeds Indoors:
Seeds — Purchasing fresh seeds will give better results than using older seeds, so pull out the seed catalogs or go online and select the plants you would like to grow this year. An advantage of starting plants from seed is that you will have access to many more choices, including harder-to-find plant varieties and organic seeds. It is also economical. If you are new to starting seeds, you may want to try these easy to grow choices: zinnias, morning glories, sunflowers, nasturtiums, parsley, basil, tomatoes, and squash.
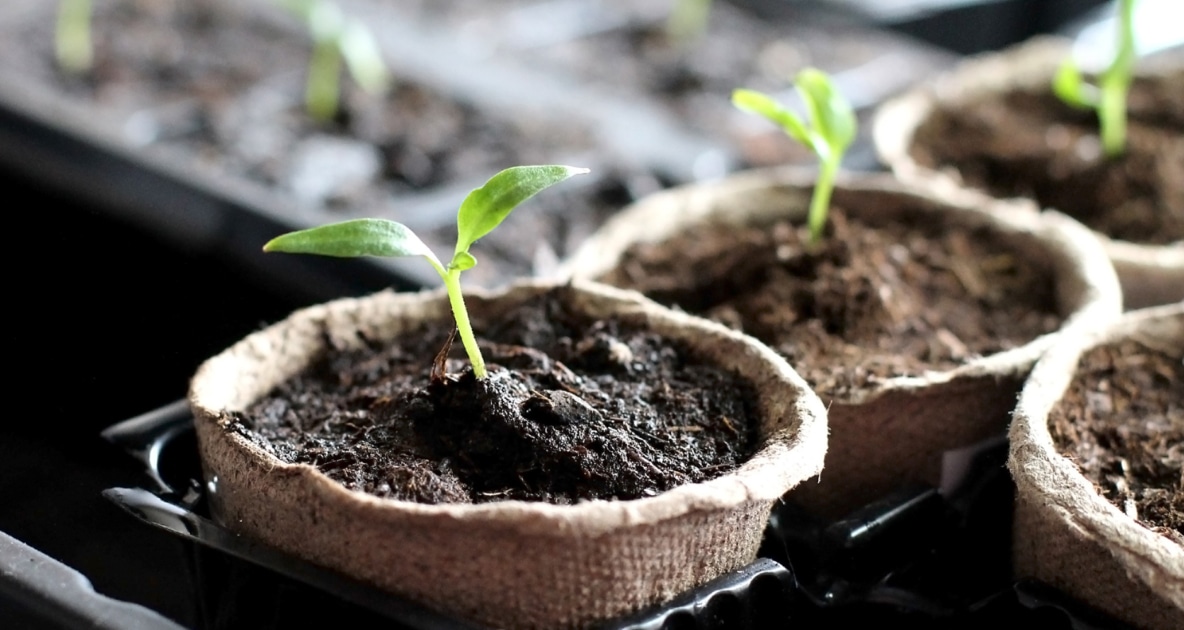
Containers — There are many types of containers suitable for starting seeds, such as trays, flats, egg cartons, cans, eggshells, and plastic containers, but it is important they are well cleaned and have good drainage. If you decide to use a fiber or peat pot, be sure to wet it thoroughly before adding soil so the pot does not draw moisture away from the growing medium.
Soil — It is best to use a commercial seed-starting mix since it is lightweight, sterile, and free of weed seeds. It will provide the loose, fine-textured, well-drained medium necessary for delicate seedling roots to grow. Potting or garden soil is not recommended due to the heavier weight and the potential for weed seeds, insects, and pathogens.
Sunlight — Seedlings normally need plenty of bright indirect sunlight — approximately 12 to 16 hours per day. A south facing window is most preferable, but if this is not possible, you may use artificial light as a supplement or substitute — either grow lights or fluorescent shop lights.
How to Start Seeds:
- Always read individual seed packets for specific instructions on how to start seeds. Seeds should typically be started about four to six weeks before you plan to transplant outdoors, making sure the transplant date will be after the last frost. Consult the Farmers’ Almanac Frost Table to estimate the last frost for your region.
- Fill containers to within 1/4 inch of the top with seed-starting mixture, and level the surface. Water the soil well, and then allow to completely drain.
- Using your finger or a pencil, make an indention in the soil for the seed. The hole should be four times as deep as the seed is wide. Cover the seed with soil.
- Temperature and humidity are the two most important factors for seed germination. Keeping the air temperature between 65 and 75 degrees Fahrenheit is ideal. Use a spray mister to water the seeds and new seedlings, or water from below by setting containers on a drip pan filled with water and allow the moisture to soak up through the bottom. Keep soil moist, but not overly wet since seeds will rot if they receive too much water. Cover containers with plastic to hold in humidity (ventilating daily) until the seeds germinate, then remove the covering.
- Consult seed packets to determine light requirements for germination. Some seeds need total darkness in order to germinate, but most require plenty of light. Once germinated, all seedlings will need healthy doses of light each day. If using a windowsill as a light source, rotate containers periodically to promote even growth.
Get Ready To Transplant!
- Once one or two sets of real leaves develop (the first set of leaves is actually a set of food storage cells called cotyledons), you can transplant each seedling into its own pot. At this point, it is okay to use an all-purpose potting soil. Water the seedling thoroughly an hour or two before transplanting to the new container. Also at this time, you may begin adding a diluted organic liquid fertilizer once a week.
- Around ten days before transplanting the seedlings outdoors, begin the process of hardening off to help the tender plants adjust to the upcoming change in environment. When daytime temperatures are at least 45 degrees, place the plants outside in a sheltered area for a few hours, gradually increasing the amount of time they spend outside each day.
- Once all danger of frost has passed, transplant the seedlings outdoors. A cloudy day is best for transplanting to avoid wilting of the plants. Water the outdoor soil thoroughly before planting the seedlings to help prevent transplant shock. Dig a hole double the size of the plant’s root ball. Set the seedling inside the hole and fill so that the root ball is covered by 1/4 inch of soil. Water deeply each day for the first week.
When you’re ready to transplant, be sure to consult the Farmers’ Almanac’s Best Days Gardening calendar for the proper Moon phase for this task. Remember, this calendar goes by phases of the Moon, not weather. So you want to be sure conditions are “weather permitting.”

My seedlings get very leggie how do I fix this