
12 Traditional Halloween Crafts to Make at Home in 2026
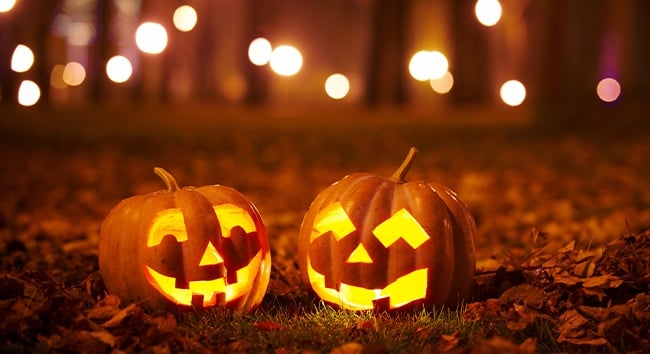
Quick Reference: 12 Traditional Halloween Crafts
- Halloween 2026: Saturday, October 31, 2026 (best trick-or-treat night in years)
- 1. Classic Carved Jack-O-Lantern: Stingy Jack folk origin, carving safety, candle vs. battery
- 2. Painted Pumpkins: no-carve faces and patterns for younger kids
- 3. Mason Jar Lanterns: orange tissue paper, mod podge, and a battery tea light
- 4. Autumn Leaf Garland: pressed maple leaves on jute string for the mantel
- 5. Apple Stamp Bats: cut apple cross-section and black paint, kitchen-table craft
- 6. Pine Cone Pumpkins: orange paint, green felt stem, tabletop arrangement
- 7. Cinnamon-Stick Brooms: small witch brooms tied with twine, doubles as a kitchen scent
- 8. Ghost Cheesecloth Lanterns: dipped cheesecloth over a wire frame, lit from within
- 9. Dried Corn Husk Witches: traditional Appalachian craft, no glue required
- 10. Spiced Apple Cider Candles: DIY soy candle with cinnamon and clove for the table
- 11. Sun-Dried Herb and Autumn Leaf Wreath: sage, lavender, rosemary on a grapevine base
- 12. Tin-Can Ghost Lanterns: upcycled cans, drilled star patterns, tealight inside
- Difficulty range: Easy (Crafts 2, 3, 5) to Intermediate (8, 11, 12)
- Family-friendly: every craft on this list has an age-three-and-up role
More fall from the Almanac: When Is Halloween | Halloween Superstitions and Symbols | Halloween Herbal Folklore | Halloween Pet Safety
Halloween 2026 falls on Saturday, October 31, which means the trick-or-treating, the porch jack-o-lanterns, and the candy bowls all line up on a full Saturday night. That is rare, and the Hunter’s Moon in October is part of why the holiday still anchors the autumn calendar. Below are twelve traditional Halloween crafts to make at home, picked the way the Almanac picks anything: seasonal first, low-tech second, family-friendly third. Every one uses materials you likely already have on hand or can pick up at a roadside stand. Pumpkins, apples, autumn leaves, cinnamon, corn husks, pine cones, mason jars, tin cans, dried herbs, and a little black paint. No power tools, no plastic skeletons, no synthetic smoke. Just the kind of October evening work that fills the kitchen with the smell of cider and leaves the porch looking like the season actually happened.
We have grouped these from the most familiar (the carved jack-o-lantern, the painted pumpkin) to the more traditional (the corn husk witch, the sun-dried herb wreath). Each one carries a short materials list and four to seven steps. Pick one for a Sunday afternoon, or stack three or four into a full October weekend. The whole list runs roughly five to seven hours of total hands-on time, spread however suits your house.
Why Traditional Halloween Crafts?
Modern Halloween leans hard on plastic. Inflatable yard figures, polyester costumes worn once, battery skeletons that end up in a landfill by Thanksgiving. Traditional Halloween crafts work in the other direction. They use what the season already gives you: pumpkins from the patch, leaves from the yard, apples from the roadside stand, corn husks from the tamale wrapper aisle, cinnamon and clove from the spice drawer. Three good reasons to lean that way.
- Folklore roots. Most of these crafts trace back centuries. Carved root vegetables for Samhain, corn husk dolls in pre-contact Indigenous nations, witch brooms in European harvest lore. Working through them is a way of telling those stories with your hands.
- Less plastic. Twelve crafts on this list, zero plastic landfill. A painted pumpkin lasts six weeks. A pine cone pumpkin or corn husk witch keeps for years.
- Family activity. Every craft has a role for a three-year-old (pressing apple stamps, gluing leaves) and a role for an adult (the carving knife, the candle pour). The kitchen table becomes the holiday rather than the screen.
Materials You’ll Have on Hand
Before you head to the craft store, walk the yard and check the spice drawer. October hands you most of what you need. The list below covers what powers eleven of the twelve crafts on this page. The twelfth (the soy cider candle) is the one that needs a small craft-store run.
- From the yard or the woods: fallen sugar maple, red oak, and aspen leaves; open pine cones; small twigs for broom handles; acorns and their caps; the last of the marigolds for the herb wreath
- From the kitchen: apples, cinnamon sticks, whole cloves, dried orange peel, sage, rosemary, lavender, mason jars, washed and de-labeled tin cans, cheesecloth
- From the roadside stand: sugar pumpkins, mini white Baby Boo pumpkins, dried corn husks, small gourds, dried Indian corn
- From the craft drawer: acrylic craft paint in black, white, orange; jute twine; hot glue gun; foam brushes; battery tea lights

1. Classic Carved Jack-O-Lantern
The jack-o-lantern is the anchor of any Halloween craft list, and the folklore behind it runs deeper than most people think. The name comes from the Irish tale of Stingy Jack, a trickster who fooled the Devil twice and was barred from both heaven and hell after he died. He was sent off to wander with a hollowed turnip and a single ember for light. Irish and Scottish families carved turnips, beets, and potatoes for centuries to ward off Stingy Jack and other wandering spirits at Samhain on October 31. When the tradition crossed to North America in the 1800s, the native pumpkin proved easier to carve and held a candle better, and the modern jack-o-lantern was born. For preservation tricks beyond what is covered here, see our guide to keeping your jack-o-lantern fresher longer.
- Materials: 1 sugar or carving pumpkin, sharp paring knife or pumpkin carving saw, large metal spoon, marker, votive candle or battery tea light
- Cut a lid at an angle into the top so it sits back in place without falling through.
- Scoop out the seeds and pulp with the spoon. Save the seeds for roasting.
- Sketch the face with a marker before any cutting. Triangle eyes and a snaggle-tooth mouth are the classic.
- Carve along the marker lines. Push out the cut pieces from inside.
- Drop in a battery tea light for safety, or a short votive if you will be supervising. Set the lid back on, leaving a small gap so the flame breathes.
- Display on the porch on October 30 or 31. A carved pumpkin holds three to five days before it softens.
Family tip: kids handle the marker sketch and the seed scoop. Adults handle the knife.
2. Painted Pumpkins
Not every house wants a knife on the kitchen table. Painted pumpkins are the no-carve alternative, perfect for younger children and for pumpkins you want to keep on the porch through Thanksgiving without softening. The University of Illinois Extension notes that an unbroken pumpkin can last six to twelve weeks in cool weather, where a carved one lasts under a week. That difference is the whole case for painting instead.
- Materials: small pumpkins or mini white pumpkins (Baby Boos), acrylic craft paint in black, white, and orange, small brushes, paper plate for a palette, damp cloth
- Wipe each pumpkin dry. Skip soap, water alone is fine.
- Set newspaper or a paper bag under the work surface to catch drips.
- Paint the base color first if you want a black ghost or a polka-dot. Let it dry fifteen minutes.
- Layer the face or pattern on top. Cat faces, owl eyes, polka dots, and stripes are the easiest.
- Let cure for an hour before moving outside. Acrylic is rain-resistant but not waterproof, so bring them in if a storm rolls through.
Family tip: a white pumpkin with a black sharpie ghost face takes a three-year-old four minutes.
3. Mason Jar Lanterns
Mason jar lanterns are the cheapest path to a porch full of warm orange light. The jar throws a steady glow without the fire risk of an open candle, and the orange tissue paper finish reads as a glowing pumpkin from across the yard. This one is a good rainy-Saturday craft for elementary-age kids.
- Materials: wide-mouth mason jar (pint or quart), orange tissue paper torn into 2-inch squares, mod podge or 50/50 white glue and water, foam brush, black construction paper, battery tea light
- Brush a thin layer of mod podge over a small section of the jar.
- Press orange tissue squares onto the wet glue, overlapping the edges. Work in sections around the jar.
- Brush a second thin coat over the top to seal. Let dry one hour.
- Cut a jack-o-lantern face out of black construction paper and glue it to the front.
- Drop a battery tea light inside. Replace the band or skip the lid.
- Group three or five jars together on a porch step for the strongest effect.
Family tip: save your fall pasta-sauce jars all September. By October you have a free lantern set.
4. Autumn Leaf Garland
Autumn leaf garlands tie Halloween back to the harvest where it belongs. A short walk in the last week of October will turn up enough sugar maple, red oak, and aspen leaves to string a mantel or a doorframe. The trick is pressing the leaves first so they keep their color through the season.
- Materials: 30 to 50 fresh fallen leaves (no soft spots), heavy book, two sheets of newspaper, jute string or twine, hot glue gun, optional clear matte sealer spray
- Sandwich the leaves between two sheets of newspaper.
- Press inside a heavy book for three to five days, or iron between the newspaper sheets on low for thirty seconds per leaf if you are short on time.
- Cut your jute string to the length of the mantel plus six inches.
- Hot-glue each leaf stem to the string, alternating colors and sizes.
- Spray with matte sealer if you want the leaves to last beyond Halloween night. Without sealer, they will hold for two to three weeks.
Family tip: the leaf hunt is the craft for kids under five. Let them sort by color before you press.
5. Apple Stamp Bats
The apple stamp is the oldest trick in the children’s craft book. Cut an apple across the middle and you get a five-pointed star inside the core. Press in black paint and you have a stamp that prints a tiny bat silhouette in two or three quick taps. Good for table runners, paper bags, brown craft paper, or homemade cards.
- Materials: 1 firm apple, sharp knife, paper towel, black tempera paint or washable craft paint, paper plate, brown craft paper or white card stock
- Slice the apple horizontally across the middle to expose the star pattern in the core.
- Pat the cut side dry with a paper towel so the paint sticks.
- Pour a tablespoon of black paint onto a paper plate.
- Press the cut apple into the paint, then onto the paper in firm short presses.
- Once dry, draw small wings on either side of each star print with a marker to finish the bat shape.
- Re-dip the apple between every two or three prints. One apple gets you sixty to eighty bats.
Family tip: the apple cross-section reveals a natural star to kids. Make that the lesson before any paint comes out.
6. Pine Cone Pumpkins
Pine cone pumpkins are the Almanac favorite for a centerpiece. They use what is already on the ground in October, they smell faintly of resin all month, and a basket of them on the table reads as autumn before you even put the candles on. White pine, ponderosa, and Norway spruce cones all work. Look for open, dry cones with no sap.
- Materials: 6 to 10 open pine cones, orange acrylic paint, foam brush, scrap of green felt, small brown twigs or cinnamon stick pieces, hot glue gun
- Brush the open scales of each cone with orange paint. Two thin coats is better than one thick one.
- Let dry on a paper bag for thirty minutes.
- Cut small leaf shapes from the green felt, roughly the size of a quarter.
- Hot-glue a leaf and a short twig or cinnamon-stick piece to the top of each cone as the pumpkin stem.
- Arrange in a wooden bowl or on a runner with a few real mini pumpkins mixed in.
Family tip: bake the cones at 200 degrees Fahrenheit for thirty minutes first to kill any hidden critters.
7. Cinnamon-Stick Brooms
The witch’s broom is a Halloween standby, but the homemade version made from a bundle of cinnamon sticks does double duty. It looks the part, and it scents the room every time you carry it past. Tie a dozen and you have party favors. Tie one big one and you have a kitchen-door hanger that will hold its scent into Thanksgiving. The broom itself carries old folklore: traditional besoms were bound with birch twigs around an ash or hazel handle, hung at a doorway to sweep negative energy away from the home. The cinnamon version is the kitchen-friendly descendant.
- Materials: 8 to 12 cinnamon sticks (4 to 6 inches long), one slightly longer thin twig or dowel for the handle, jute twine, small piece of plaid or burlap ribbon
- Lay the cinnamon sticks flat in a bundle. Even out the bottom ends so they sit flush.
- Slide the longer twig or dowel up the back as the broom handle. It should extend three to four inches above the bundle.
- Wrap the twine tightly around the bundle five to seven times, pulling firm with each pass.
- Tie off the twine in a square knot at the back.
- Tie a small ribbon bow over the twine in front for the finishing touch.
- Hang on a doorknob, lean against a stack of pumpkins, or tuck into a centerpiece.
Family tip: save the leftover broken cinnamon sticks for the cider candle in Craft 10.
8. Ghost Cheesecloth Lanterns
The cheesecloth ghost is the closest a homemade Halloween craft gets to a real spook factor, and it does it without any plastic or printed art. The trick is in the starch dip, which lets the cloth hold any shape you want and dry stiff. Sit the finished ghost over a battery tea light on the porch and you have a glowing figure that flickers in the wind.
- Materials: 1 yard of cheesecloth, 2 cups liquid starch (or 1 cup white glue + 1 cup water), foam ball or balloon, plastic bottle or wire frame as the body, two small black felt circles, battery tea light, plastic sheeting to protect the work surface
- Build the body shape. A foam ball on a plastic bottle works, or a wire frame in the rough shape of a hunched figure.
- Cover the body with plastic wrap so the cheesecloth releases cleanly later.
- Soak the cheesecloth in the starch or glue mixture for one minute, then wring out the excess.
- Drape the wet cheesecloth over the body in soft folds. Pull the front to suggest arms or a hood.
- Let dry overnight, or six to eight hours near a fan.
- Carefully lift the stiffened ghost off the form. Glue two black felt eyes to the front.
- Set on a porch step over a battery tea light. The light glows softly through the cloth.
Family tip: kids ages five and up handle the drape and fold step well. Adults handle the starch dip.
9. Dried Corn Husk Witches
The corn husk doll is one of the oldest American crafts, made by Cherokee, Iroquois, and other Indigenous nations long before European settlement, and later picked up across Appalachia and the Ozarks. A Halloween witch is the seasonal variation: same construction, with a small black scrap for a cape and a tiny cinnamon-stick broom in her hand. No glue needed if you tie the knots right.
- Materials: 6 to 8 dried corn husks (sold in the Mexican food aisle as tamale wrappers), warm water, scissors, jute string or natural twine, small scrap of black fabric, small cinnamon-stick broom from Craft 7
- Soak the dried husks in warm water for fifteen minutes until pliable.
- Stack four husks together, fold in half, and tie a string an inch below the fold to form the head.
- Roll a short husk into a tube and slide it through the body just below the head as the arms. Tie each end to form wrists.
- Tie another string at the waist below the arms.
- Leave the lower husks loose as the skirt, or split them into legs and tie the ankles.
- Drape a small black scrap over the shoulders as a cape. Tuck a tiny cinnamon broom under one arm.
- Let dry overnight before displaying. The husk stiffens as it dries.
Family tip: the traditional husk doll has no face. Older kids appreciate the Haudenosaunee teaching behind that detail.
10. Spiced Apple Cider Candles
A homemade candle is the most generous craft on this list. It is the one you can make in batches, give to neighbors, and still keep a few for your own kitchen table on Halloween night. Soy wax melts at a low temperature, so it is safer than paraffin, and the cinnamon, clove, and orange peel scent reads as cider from the first match. The National Wildlife Federation reminds us that simple seasonal craft work with kids ties them to the natural calendar, and a candle made together holds that lesson long after the wick is gone.
- Materials: 1 pound soy wax flakes, double boiler or large heat-safe glass measure, 4-ounce mason jars, pre-tabbed candle wicks, wooden skewers, cinnamon sticks, whole cloves, dried orange peel, optional 1 teaspoon apple-cinnamon fragrance oil per jar
- Set the wicks in the center of each empty mason jar. Use a dab of melted wax to hold the metal tab to the jar bottom.
- Lay a wooden skewer across the jar mouth and clip the wick upright against it.
- Melt the soy wax in a double boiler over low heat, stirring slowly, until fully liquid (about 180 degrees Fahrenheit).
- Remove from heat and stir in the optional fragrance oil.
- Pour the wax into each jar, leaving an inch of headroom.
- Press a cinnamon stick and a few cloves into the wax along the edge of each jar before it sets.
- Let cure undisturbed for twenty-four hours before trimming the wicks to a quarter inch and lighting.
Family tip: the wax pour is an adult-only step. Kids press the spices into the cooling wax in step six.
11. Sun-Dried Herb and Autumn Leaf Wreath
The sun-dried herb wreath is the most folklore-literate craft on this page. Sage, rosemary, and lavender were all hung at doorways in old European households on Hallowmas eve to clear the home before winter. The wreath version layers those herbs on a grapevine base with pressed autumn leaves and a few sprigs of the last marigolds. The result is a doorway piece that smells faintly of the kitchen garden every time the door opens, and that you can leave up clear through Thanksgiving. For more on the herbal lore behind October 31, see our guide to Halloween herbal folklore.
- Materials: 10-inch grapevine wreath base, small bundles of fresh sage, rosemary, and lavender (sun-dried for three days), 15 to 20 pressed maple or oak leaves, a few dried marigold heads, jute twine, floral wire, hot glue gun
- Tie the fresh herb bundles in small batches with twine, then lay them flat on a screen in a sunny window for three days until dry.
- Lay the grapevine wreath flat on the work surface.
- Wire the dried herb bundles to the wreath in clusters, working in one direction so the stems all face the same way.
- Hot-glue the pressed leaves between the herb clusters, overlapping for fullness.
- Tuck the dried marigold heads in three or four spots for a pop of orange.
- Tie a loop of jute at the top for hanging.
- Hang at eye level on the front door, the kitchen door, or the mantel.
Family tip: the leaf hunt and the marigold harvest are kid jobs. The drying and wiring are quiet evening work for an adult.
12. Tin-Can Ghost Lanterns
Tin-can lanterns are the upcycling craft on this list. Wash out and de-label any can from the recycling bin (soup, beans, coffee), drill or hammer a pattern of small holes in the side, and slip a battery tea light inside. The pinpoints of light look like stars on the porch step. Paint the cans white for ghosts, black for cats, or orange for jack-o-lanterns. This one is satisfying for school-age kids because the result is dramatic and the process feels like real workshop work.
- Materials: 3 to 5 clean tin cans (labels removed), water, freezer, hammer, nail or small drill bit, white or black acrylic paint, foam brush, black sharpie, battery tea lights
- Fill each can with water and freeze overnight. The ice block stabilizes the can so it does not dent when you punch holes.
- While the cans are still full of ice, hold each can against a folded towel and tap small holes through the side with a hammer and nail in any pattern you like. Stars, ghost faces, jack-o-lantern smiles all work.
- Let the ice melt and dry the cans completely.
- Paint each can white (ghosts), black (cats), or orange (pumpkins). Two thin coats.
- Once dry, draw a face on the front with the sharpie if you want a ghost or cat.
- Drop a battery tea light in each can and group them on the porch steps.
Family tip: the hammer work is for kids age eight and up under supervision. Younger kids handle the painting and the face drawing.
Halloween Crafts Around the World
Halloween as Americans know it is one branch of a much older family of autumn holidays. The crafts each tradition leans on tell you a lot about how those cultures meet the end of the harvest season.
The Mexican craft tradition is the most visually distinct cousin many North American families now borrow from. Cut-paper papel picado banners use the same skill set as a string of paper snowflakes and are a perfect crossover for a household that already does the kitchen-table crafts on this list.
Halloween Crafts for Kids
The crafts that work best for kids under ten are the ones with a fast finish, a clear job for small hands, and no sharp tools. Three picks the Almanac always recommends for that age group.
- Painted pumpkins (Craft 2). A white Baby Boo pumpkin and a single black sharpie is enough for a three-year-old’s first Halloween craft. Older kids can paint patterns with brushes.
- Apple stamp bats (Craft 5). The cross-section star is its own little science lesson, and the printing is repetitive in the good way. A four-year-old will print forty bats and call it a Saturday.
- Acorn-cap mushroom decorations. Paint a small wooden bead red with white dots for the cap, then glue an acorn to the bottom for the stem. Three mushrooms take fifteen minutes. Lay them in a basket with the pine cone pumpkins for a woodland centerpiece.
A fourth easy one if you want a backup: dried orange-slice garland. Slice oranges a quarter-inch thick, dry in a 200-degree Fahrenheit oven for two and a half hours, then string the dried slices with cinnamon sticks on jute twine. A six-year-old can thread the string with a yarn needle. The garland smells like a kitchen at Christmas and works on the mantel or in a window.
Halloween Crafts for Adults
The crafts on this list that reward a quiet adult Saturday afternoon are the ones with a few more steps, a touch of patience, and a result you can keep for years. The sun-dried herb wreath (Craft 11) and the spiced apple cider candle (Craft 10) are the two to plan around. A fall Saturday with a pot of cider on the stove, the dried herbs from the summer garden, and a friend or two over for the candle pour is the kind of evening Halloween used to be before it went plastic. Add the cheesecloth ghost (Craft 8) if you want one craft with a wow factor for the porch.
For those who like a folkloric layer to the work, the herb wreath has a long history at the doorway. Sage to clear, rosemary for remembrance of the dead, lavender for peaceful sleep on the longest nights of the year. Working the bundles with that in mind turns the craft hour into something closer to a small October ritual.
Storing and Reusing Your Crafts
Most of these crafts are not single-use. A few simple storage habits will let you pull the same boxes out next October instead of starting from scratch.
- Painted pumpkins and gourds (Craft 2): store in a cool dry basement or garage. Real gourds last two to three years if they fully dry out.
- Pine cone pumpkins (Craft 6): wrap in newspaper and store in a cardboard box. They keep for years.
- Cinnamon-stick brooms (Craft 7): hang in a closet or store flat in tissue paper. Refresh the scent each year with three drops of cinnamon essential oil.
- Cheesecloth ghosts (Craft 8): store stiffened, in a plastic bin with newspaper between layers. They will hold their shape for three to five years if kept dry.
- Corn husk witches (Craft 9): wrap in tissue and store in a shoebox. They last indefinitely in a dry closet.
- Herb wreath (Craft 11): hang in a cool dry place after Halloween. It will hold its scent through Christmas. Compost in early spring.
- Tin-can lanterns (Craft 12): stack in a milk crate. The painted finish holds for years.
Halloween 2026 Night: A Saturday to Plan For
Halloween 2026 lands on Saturday, October 31, which has not happened in years. A Saturday Halloween means the trick-or-treaters arrive a little earlier, the porch traffic lasts a little longer, and there is no school-night cutoff at eight. If you are working through this craft list, plan to finish the carved pumpkin (Craft 1) and the cheesecloth ghost (Craft 8) on Friday, October 30, so both are settled and dry by sunset Saturday. Light the cider candles (Craft 10) at four in the afternoon. Hang the herb wreath (Craft 11) on the front door that morning. Line the tin-can lanterns (Craft 12) along the walk by five. The whole porch will be glowing by the time the first costumes turn into your walk.
For more on the night itself, see our companion guides to when Halloween is, Halloween superstitions and symbols, and the Halloween pet safety guide for households with dogs and cats nervous about the doorbell.
Safety, Storage, and a Word on Open Flames
Three quick rules cover most of what can go sideways on a craft Saturday. First, the carving knife is an adult tool. Kids paint, scoop, and decorate, but the cutting is a parent’s job. Second, battery tea lights are the right pick for any craft a child will carry, set on a porch, or place near fabric, paper, pine cones, or dried herbs. Save real candles for the table under direct supervision. Third, store the painted pumpkins, pine cone pumpkins, corn husk witches, and tin-can lanterns in a cool dry place if you want them again next October. Most of these crafts hold up for years.
The best part of working through a list like this is what it teaches without saying so. Halloween used to be a folk holiday, the night the harvest closed and the kitchen turned to spice and candlelight. Plastic and bulk candy have their place, but a porch lit with a row of mason jars, a row of tin-can ghosts, and a carved pumpkin with a real candle behind a real face is the version that holds up year over year. Plan ahead, work in batches, and pass the tradition down.

Frequently Asked Questions
What is the easiest Halloween craft for kids?
The painted pumpkin (Craft 2) is the easiest. A white Baby Boo pumpkin and one black sharpie is enough for a three-year-old’s first Halloween craft. The apple stamp bats (Craft 5) and the mason jar lanterns (Craft 3) are the next two up. All three finish inside an hour with no sharp tools beyond an adult-handled paring knife.
How do I preserve a carved pumpkin?
A carved pumpkin holds three to five days at most before the cut edges soften and mold sets in. To stretch that, carve no earlier than October 30, scrape the inside walls thoroughly, spray the cut surfaces with a 1-tablespoon peppermint Castile soap in a quart of water mix (peppermint is a natural antifungal), and apply petroleum jelly to the cut edges to slow dehydration. Full details are in our guide to keeping your jack-o-lantern fresher longer.
What are traditional Irish Halloween crafts?
The two oldest traditional Irish Halloween crafts are the neep (turnip) lantern and the barmbrack fortune-telling cake. The neep lantern is the original jack-o-lantern, predating the American pumpkin version by centuries. Irish families still carve turnips for Oíche Shamhna, often alongside the now-common pumpkin. The barmbrack is a sweet bread baked with a ring (foretelling marriage), a coin (foretelling wealth), and a thimble (foretelling a single life) pressed into the dough.
Can I make Halloween crafts from things I have at home?
Yes. Eleven of the twelve crafts on this list use materials you likely already have on hand or can gather from the yard, the kitchen, or the recycling bin. Pumpkins, apples, autumn leaves, pine cones, cinnamon and clove, mason jars, tin cans, and cheesecloth cover most of it. The only craft that calls for a craft-store run is the spiced apple cider candle (Craft 10), which needs soy wax flakes and pre-tabbed wicks.
When is Halloween 2026?
Halloween 2026 is Saturday, October 31, 2026. A Saturday Halloween is the most family-friendly version of the holiday because the next morning is not a school day. The next Saturday Halloween after 2026 is 2031.
Are these Halloween crafts safe with real candles?
Battery tea lights are the safest pick for any craft a child will carry or any craft involving fabric, paper, pine cones, dried herbs, or tissue paper (the mason jar lanterns, the cheesecloth ghosts, the pine cone pumpkins, the herb wreath, and the tin-can lanterns). A real votive is fine inside a carved pumpkin with the lid open a crack for airflow, under direct adult supervision. The soy cider candle in Craft 10 is safe to burn in its glass jar on a flat heat-safe surface.
What if I don’t have time to do all 12 crafts?
Pick three. The Almanac’s recommended starter set is one carved jack-o-lantern (Craft 1), one mason jar lantern (Craft 3), and one batch of cider candles (Craft 10). Together those three cover the porch light, the indoor mood, and the gift exchange in under three hours of total work. Add the herb wreath (Craft 11) if you want the front door done too.
Are corn husk dolls really an old American craft?
Yes. Corn husk dolls were made by the Iroquois, Cherokee, and many other Indigenous nations long before European contact, and the practice spread across rural America through Appalachia and the Ozarks. The traditional doll has no face, tied to a Haudenosaunee teaching about not setting one figure above another. The Halloween witch variant adds a black cape and broom while keeping the same traditional husk-and-tie construction.

Josh Morley grew up in Liverpool, where checking the sky before you leave the house is less a habit than a survival skill. He has spent his working life with data, and he came to the Farmers' Almanac by way of the thing the two have in common: the weather is the largest dataset any of us live inside, and most of us read it every day without noticing.
- Josh Morley

- Josh Morley
- Josh Morley
- Josh Morley