

Easy Ways to Save Seeds: A 6-Crop Harvest, Dry, and Store Guide
Love your cucumbers this year? Learn how to save them, and seeds of many of the other vegetables you planted!
Quick Reference
- Timing rule: harvest seeds after fruits and pods have ripened, but before they rot.
- Fermentation crop: tomatoes only. Three days at 70 degrees Fahrenheit separates viable seeds from gel and kills seed-borne disease.
- Drying temperature: below 90 degrees Fahrenheit, even and dry. Never speed up drying with heat, or you kill the germ.
- Storage rule: cool, dark, dry, rodent-free. Paper envelopes for most, breathable bags for legumes. Fridge or freezer for long haul.
- Hybrid caveat: F1 hybrid seeds do not come true. Save only from open-pollinated (heirloom) plants for reliable results.
- Best-year rule: saved seeds germinate best the season after harvest, then decline slowly. Onions and parsnips fade at 1 year; tomatoes, peppers, and beans hold 4 to 5 years.
Thinking about saving seeds from the plants you grew this year? Good instinct. A single well-timed tomato saves you a $4 packet next spring, and a bean pod left to rattle on the vine banks a family variety that never appears in any catalog. The steps below are the same ones the Almanac’s gardening editors follow, cross-checked against university extension guidance so nothing in your saved-seed jar goes moldy by January.
The Seed Savers Exchange, which safeguards the largest heirloom seed collection in North America, groups home-savable crops by pollination habit: self-pollinated (tomatoes, peppers, beans, lettuces) come true from seed with no extra effort; cross-pollinated (cucumbers, squash) need isolation distance or hand-pollination if you want a true-to-type harvest. Below is what to do with each of the six crops covered in the original guide, updated with a viability test at the end.
Harvesting and Processing Seeds
Seeds must be mature before they are harvested. Gather them after the fruits and pods have ripened, but before they rot. Different methods of harvesting and processing seeds depend on the plant species and the fruits or pods involved. Familiarity with the methods below will help you get past year one.
- CUCUMBERS. Leave cucumbers on the vine until they are well beyond the edible stage, or the seeds will be immature. The cucumbers should turn soft and off-color. Split them in half and hollow them out. Separate the seeds from their gelatinous coating by soaking them overnight in warm (not hot) water. If the coating is not gone by morning, gently rub the seeds between your fingers to remove what is left.
- LETTUCES. Harvest the seeds from the last plant that goes to seed after the yellow flowers have turned into whitish wisps. A single bolted lettuce head yields hundreds of seeds. Cornell’s home-gardening pages note lettuce is highly self-pollinated, so isolation distance is not a concern in a small backyard.
- PEPPERS. Harvest peppers when they are fully ripe. Pepper varieties can be confusing; some are green when fully ripe, others red or brown. Make sure you know what color the peppers should be. When your selected pepper reaches maturity, pick it and slice it in half. Scoop the seeds and spread them out, taking care to keep them from ending up in pairs or clumps.
- TOMATOES. Harvest tomatoes when fully ripe, but not rotten. Confirm the target color: a yellow pear tomato is never going to turn red. Like cucumber seeds, tomato seeds are encased in a gelatinous coating, but they are separated from that coating by fermentation, which mimics the natural rotting process and kills seed-borne diseases. Slice the tomatoes and squeeze the seeds into a bowl. Add water and let this mixture stand for several days at room temperature in an out-of-the-way place, stirring occasionally. Mold will form on the surface. How quickly this mold develops depends on the temperature; at 70 degrees Fahrenheit, 3 days should suffice. The pulp and worthless seeds will rise to the surface and can be skimmed off along with the mold. The viable seeds will sink to the bottom, where they can be strained and rinsed. While this process may seem daunting, it is worth it, because shortcuts affect germination.
- SUMMER SQUASH. Harvest when you cannot dent the squash with a fingernail. Summer squash is treated much like cucumbers (same botanical family). However, you will not find a coating on squash seeds, so all you have to do is wash them enough to clean off any meaty remains or slimy tendrils.
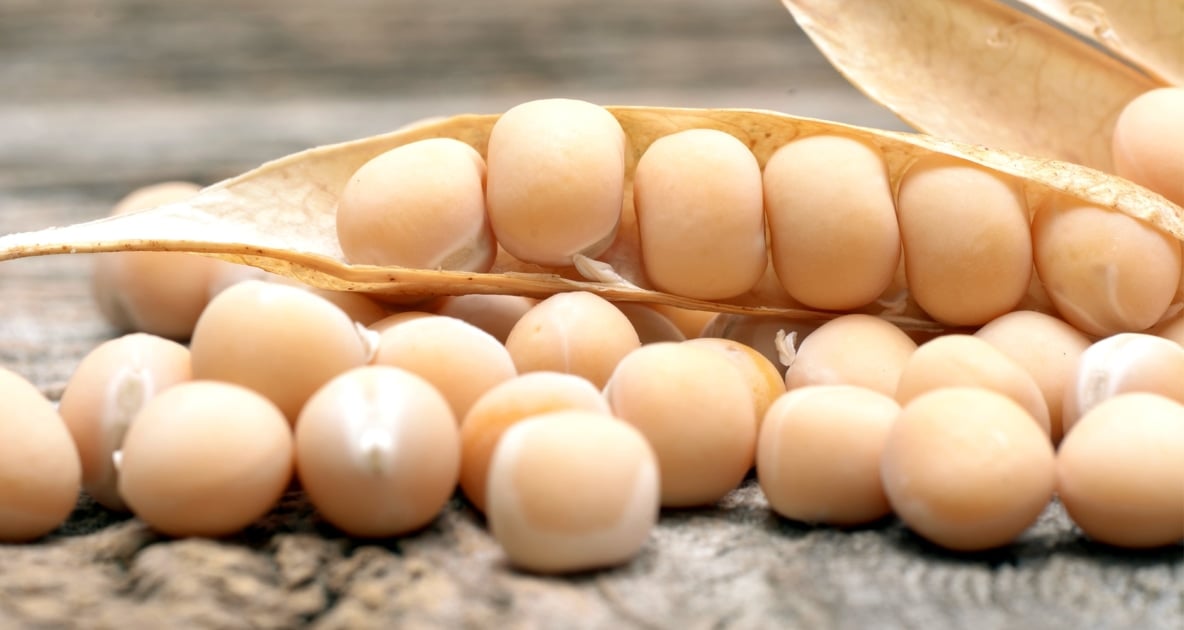
- BEANS, PEAS, AND OTHER LEGUMES. Leave beans or pods on the plants or vines until they rattle or cannot be dented by your teeth, then harvest before the seeds are dispersed.
Drying Seeds
After gathering your seeds and processing them if needed, clean, rinse, and drain them. The final stage before storage is drying them thoroughly, which takes a few days to a week. Some seed savers dry seeds on china or plastic plates. Others use newspapers or paper products, though they risk having their seeds glue themselves to the paper. Still, others use screens, which have the best ventilation. Whichever container or surface you choose, scatter the seeds carefully to keep them from drying in pairs or clumps. Small seeds that can shatter or blow away can be encased in fine mesh or a paper bag.
Leave your seeds in a dry place where the temperature will stay even and below 90 degrees Fahrenheit. Higher temperatures can kill many seed varieties. Be sure to stir your seeds around and turn them over so that all their surfaces get exposed to the air.
If your seeds begin sprouting, the drying process has been too slow, and you will have to start over. You may need to switch to screens or use a fan to improve ventilation. Do not use heat to speed up the drying process; it may kill your seeds. When your seeds are brittle and hard, but not dried out, you can put them away.
Storing The Seeds You Have Saved
Now that you have successfully gathered and dried your seeds, do not negate all of your hard work by storing them incorrectly. Store your seeds where they will remain cool, in the dark, and dry. Many people place their seeds in the refrigerator.
By hand, gently rub off any chaff. Then store your seeds in simple paper envelopes (except for beans, peas, and other legumes, which should be stored in breathable bags). Be sure to seal and carefully label each envelope or bag with the variety, date, and any other pertinent information. Avoid opening packages until you are ready to plant; otherwise, moisture may dampen your seeds or cause them to mold.
Your seeds will ‘hibernate’ happily all winter long, provided you have stored them in a cool, dark, dry, and rodent-free place. The day before you intend to do your planting, take the seeds out of storage so they can warm to room temperature. From then on, treat them the same way as your store-bought varieties.
The seeds you have saved will germinate best the following year. Thereafter, germination rates will decline depending on the quality of the original seeds, the types of seeds, and their storage conditions. In the end, it is best to replant, and then select the best plants for seed saving each and every year.
How Long Saved Seeds Actually Stay Viable
Every gardener asks this at some point. The University of Massachusetts Extension seed-viability chart lists typical germination lifespans for properly stored seeds. Numbers assume a cool, dry, sealed container:
- 1 year: onions, parsnips, leeks. Buy or save fresh every spring.
- 2 years: corn, peppers, sweet corn.
- 3 years: beans, peas, carrots, celery.
- 4 years: tomatoes, beets, chard, eggplant, spinach.
- 5 years: cucumbers, lettuces, melons, radishes, squash, brassicas.
Viability test: before planting any packet older than 2 years, place 10 seeds on a damp paper towel, fold it, seal in a plastic bag, and set on top of the fridge for 5 to 10 days. Count how many sprouted. If 7 or more of the 10, plant as normal. If 4 to 6, sow twice as thick. Under 4, retire the packet.
When to Save Seeds By Region
The “leave the fruit on the vine” step in every method above only works if the frost holds off long enough for the seeds to mature. A quick regional cheat sheet, cross-checked against the Old Farmer’s Almanac frost date lookup:
- USDA Zones 3-5 (Upper Midwest, New England, Canadian Prairies): pick your seed-saving fruits by early September and finish drying indoors before humidity spikes.
- Zones 6-7 (Mid-Atlantic, Ohio Valley, Pacific Northwest): the classic late-September to mid-October harvest window works for tomatoes, peppers, and beans.
- Zones 8-9 (Southeast, Texas, coastal California, Southwest): a longer window (October through November) and, in Florida, a second seed-saving pass in early spring.
- Zones 10-11 (South Florida, Hawaii, coastal Southern California): tomato and pepper seed saving can run nearly year-round, but watch for humidity mold during the summer wet season.

Frequently Asked Questions
Can I save seeds from any tomato I buy at the grocery store?
Only from heirloom or open-pollinated varieties. Grocery-store tomatoes are almost always F1 hybrids, so saved seeds either fail to germinate or produce a plant that looks nothing like the parent.
Do I really need to ferment tomato seeds?
Yes, if you want reliable germination. The 3-day fermentation dissolves the gelatinous coating that inhibits sprouting and kills tomato-mosaic virus and other seed-borne diseases. Skip it and you often lose half the harvest.
How long can I store saved seeds?
Depends on the crop. Onions and parsnips fade at 1 year, tomatoes and peppers hold 4 to 5 years, and cucumbers and squash last up to 5 years in a sealed, cool, dark container. See the viability chart above.
What is the best container for long-term seed storage?
A sealed glass jar with a silica packet in the fridge (35 to 40 degrees Fahrenheit) or freezer. Paper envelopes inside the jar keep varieties separate and let you label date, variety, and notes.
Why did my saved seeds mold in storage?
Almost always because they were not dry enough before storage. Test with the snap rule: a dry seed breaks cleanly like a twig. If it bends, it needs more drying time.
Can I save seeds from a plant that got a disease this year?
No. Seed-borne diseases like tomato mosaic virus and pepper anthracnose ride along in the seed. Cull any fruit from an obviously diseased plant before you start the fermentation or spread-and-dry step.
Do saved seeds need cold stratification before planting?
Vegetable crops (tomatoes, peppers, beans, cucumbers, squash, lettuces) do not. Some flower and native perennial seeds do; check the species before you sow.
Is it legal to trade saved seeds?
Yes, non-commercial home seed swapping is legal in every US state. Commercial seed sales require labeling per state agricultural rules, but a swap between gardeners does not.


Jean Grigsby
Jean Grigsby is a writer, who lives on the banks of the Kennebec River in Chelsea, Maine. She enjoys working out, reading, and running her marketing and public relations business, The Write Approach. Her article, Where Are All The Birds? appears in the 2021 Farmers' Almanac.
- Jean Grigsby

- Jean Grigsby
- Jean Grigsby
- Jean Grigsby





Did I miss you commenting on hybrid seeds not producing the same vegetable that you harvested. Unless your raising heirlooms you could be very disappointed with your results.