How to Clean Brass Cabinet Hardware With Lemon and Salt
No need to buy new! These kitchen cabinet pulls get a makeover with a simple and inexpensive hack that is one of our favorites!
Quick Reference: How to Clean Brass Cabinet Hardware
- The hack: a halved lemon dipped in table salt, scrubbed across the metal, melts tarnish away.
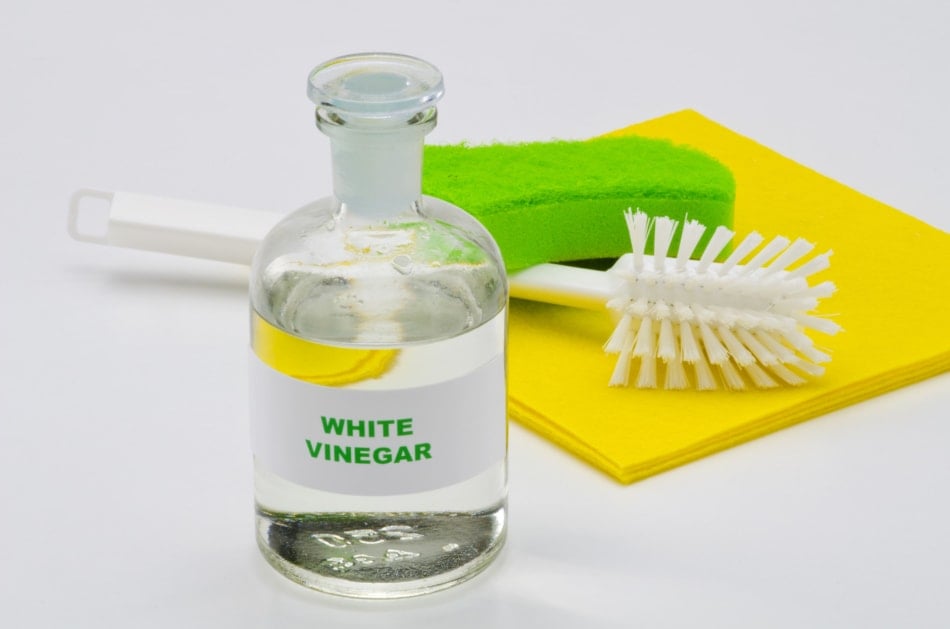
- Prep first: soak the hardware in hot water and white vinegar for an hour, then hot water and Dawn for another hour.
- Finish: rinse, dry, then buff with a little lemon oil and an old T-shirt.
- Wear gloves: lemon juice is hard on the hands over a big batch.
- Also works on: copper, including the bottoms of copper cookware.
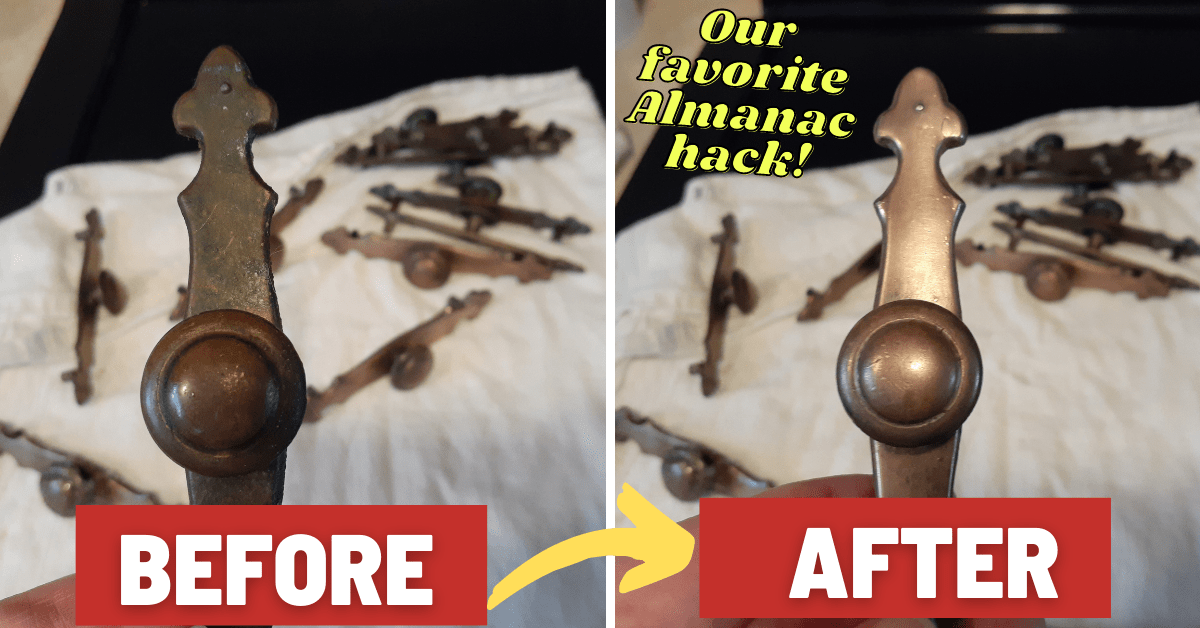
Outdated kitchen cabinets do not always need a full remodel. Before you spend on new fixtures, take a hard look at the pulls and knobs already on the doors. If they are brass, you can clean brass cabinet hardware back to a shine with a halved lemon, a little table salt, and an hour or two of soaking. It costs pennies, not a paycheck, and it is one of our favorite Farmers’ Almanac hacks. Here is exactly how we did it on a full kitchen’s worth of tarnished pulls.
The cabinets in this kitchen were a bit outdated. All right, a lot outdated. Replacing them was not in the budget, so the next best idea was to freshen the look by swapping the hardware. A simple fix like new cabinet hardware really can give a kitchen a lift for a fraction of the cost of remodeling.
Then the old Farmers’ Almanac wisdom kicked in, the kind a grandmother who raised a family during the Depression would say right out loud:
“Don’t spend your money on new fixtures! Fix up the old! What, are you crazy?“
So why is the first instinct always to buy new? With a little elbow grease and one of our favorite Almanac hacks, tarnished cabinet pulls and drawer knobs will shine up like new. Replacing 16 kitchen cabinet pulls and 8 drawer knobs was not a budgeted expense, so cleaning and polishing them made far more financial sense. Misgivings aside, it was time to get to work.

Getting Started
The whole project breaks into three steps: clean, shine, and enjoy. None of it takes special tools, just a screwdriver, a washtub, and a few things already sitting in the kitchen.
Step 1: Clean and Degunk
First, check what the hardware is made of. In this kitchen it was all brass, and only the pulls and knobs needed the treatment. The hinges looked fine.
Remove everything with a screwdriver and drop the screws in a bag so none go missing. Toss the gunky pulls and knobs into a washtub filled with about a gallon of hot water and a cup of white vinegar, one of the most useful cleaners in the house. Let them soak for about an hour. Then drain the tub and fill it again with the same amount of hot water and a squirt of Dawn dish soap, and let everything soak in the suds for another hour.
Those two soaks loosen years of kitchen build-up, which scrubs away with a kitchen scrubbie pad. Once the pieces are clean, rinse them thoroughly. Next comes the fun part.
Step 2. Shine
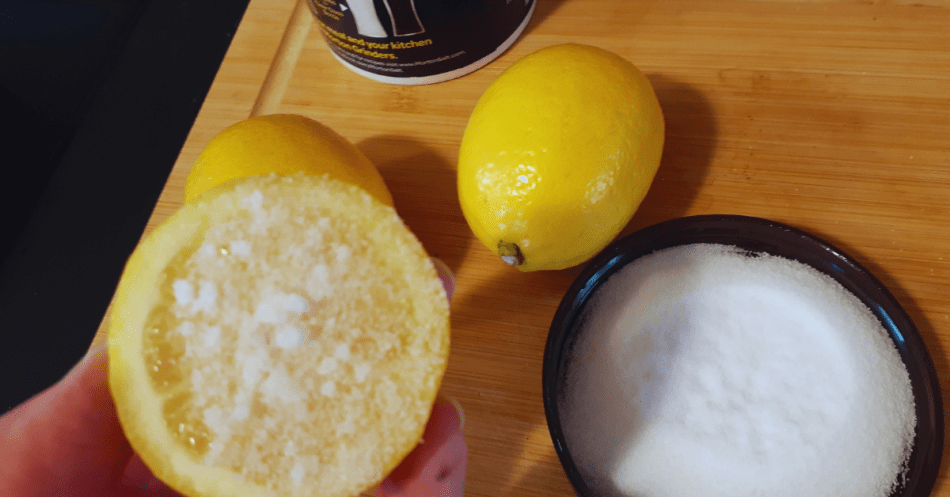
With the pieces clean, it is time to shine the tarnished brass. The Farmers’ Almanac keeps several metal-polishing tricks on hand, including dipping items in a bowl of ketchup, but the star here is the popular salt and lemon hack. Cut a lemon in half, dip the cut side in table salt, then scrub it across the hardware like a scouring pad. The tarnish melts away. And it did.
Rinse everything again, dry it with a towel, then let the pieces air-dry completely.
Note: the lemon juice can be tough on the hands, especially when you are working through so many items, so wear kitchen gloves for this one.
Step 3. Enjoy The Finished Product
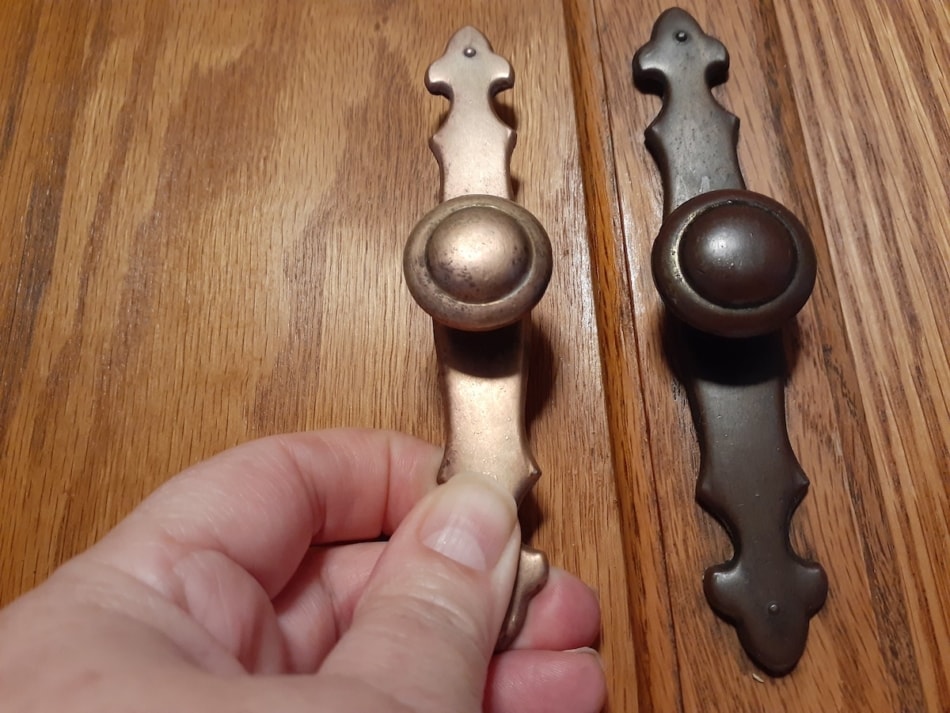
Before screwing everything back into place, buff the hardware with a little lemon oil and an old T-shirt as a final step. That is it. The pulls look like new, and the whole kitchen gets a lift from the gleaming brass.
The same method works on copper too. It does a fine job on the bottoms of copper cookware.
This kind of project proves you can repurpose with a purpose. Rather than burn a hole in your wallet, you might burn a few calories instead. Check out all of Farmers’ Almanac’s helpful hints and tips here.
Why Brass Cabinet Hardware Tarnishes
Brass is an alloy of copper and zinc, and it is the copper that reacts with oxygen, moisture, and everyday grease to form the dull brown or greenish film we call tarnish. In a kitchen, cooking steam, fingerprints, and airborne oils speed the process along, which is why cabinet pulls dull faster than a doorknob down the hall.
The good news is that tarnish is only surface-deep. A mild acid like lemon juice or vinegar lifts it away without harming the metal underneath, and the salt works as a gentle scouring grit. That is the whole reason the lemon and salt hack works: acid to dissolve the film, grit to carry it off.
Is Your Hardware Solid Brass or Brass-Plated?
Before you scrub, find out what you are working with, because the lemon and salt hack is meant for solid brass. Hold a magnet to a pull. If the magnet sticks, the piece is brass-plated over steel, and the thin brass layer can wear through under abrasive salt. If the magnet does not stick, you most likely have solid brass and can polish with confidence.
For plated hardware, skip the salt. Use only the mild soap and vinegar soak, wipe gently, and dry it well so the plating stays put. When in doubt, test one hidden knob first and see how the finish holds up.
Keeping the Shine
Fresh-polished brass will slowly tarnish again, and that is normal. A quick wipe with a soft, dry cloth every week or two keeps oils and moisture from settling into the finish. Once or twice a year, repeat the lemon and salt treatment on any pulls that have dulled.
Some folks like the aged look of a natural patina and let it develop on purpose. There is no wrong answer here. Do what suits your kitchen and the look you are after.

How to Clean Brass Cabinet Hardware: Frequently Asked Questions
What is the best way to clean brass cabinet hardware?
Soak the removed pulls and knobs in hot water and white vinegar for an hour, then in hot water and Dawn dish soap for another hour, and scrub off the loosened build-up. Shine the clean brass by scrubbing it with a halved lemon dipped in table salt, then rinse, dry, and buff with a little lemon oil.
Does the lemon and salt hack really remove tarnish?
Yes. The acid in the lemon juice dissolves the tarnish film while the salt acts as a gentle grit to carry it away. Cut a lemon in half, dip the cut side in table salt, and scrub it across the hardware like a scouring pad. The tarnish melts away, and the same trick works on copper.
How do I know if my hardware is solid brass or brass-plated?
Hold a magnet to a pull. If it sticks, the piece is brass-plated over steel, and abrasive salt can wear through the thin brass layer, so use only the soap and vinegar soak. If the magnet does not stick, you most likely have solid brass and can use the full lemon and salt hack.
Can I use this method on copper?
Yes. The lemon and salt hack works on copper as well as brass, and it does a fine job on the tarnished bottoms of copper cookware. Rinse and dry the copper well afterward, since leftover salt and acid can pit the surface over time.
Do I need to remove the hardware from the cabinets first?
For the two soaking steps, yes. Take the pulls and knobs off with a screwdriver and keep the screws in a bag so none go missing. Soaking loosens years of kitchen grease far better than wiping the pieces in place, and it lets you reach every edge with the lemon and salt.
How often should I clean brass cabinet hardware?
Wipe the pulls with a soft, dry cloth every week or two to keep oils and moisture from settling in, and repeat the full lemon and salt treatment once or twice a year on any that have dulled. If you prefer the look of a natural patina, you can let it develop and clean less often. Do what suits your kitchen.

This article was published by the Staff at FarmersAlmanac.com. Any questions? Contact us at questions@farmersalmananac.com.
- Farmers' Almanac Staff

- Farmers' Almanac Staff
- Farmers' Almanac Staff
- Farmers' Almanac Staff


Great but I found the best hack for TRULY tarnished brass…Water, vinegar and salt in a non-reactive pot. Boil and add the hinges…..Like magic. Then polish and dry….