Plan Your Garden: A Simple Step-by-Step Layout Guide
It might still be winter outside but it’s never too early to start planning your home vegetable garden. Start now!
Quick Reference: How to Plan Your Garden
- Start with: a single sheet of paper, ideally graph paper so you can draw to scale.
- Set the scale: let each square equal a 3″ by 3″ space, so 16 squares make one square foot.
- Leave room: keep rows 3′ to 4′ wide and walkways 18″ to 24″ wide.
- Space your plants: use the seed packet, such as 24″ to 36″ between tomato plants.
- Rotate crops: move each vegetable family to a new spot each year to keep the soil healthy.
- When to start: now. Planning is a winter job that pays off the moment the ground is ready.
Even though it is winter outside, it is never too early to plan your garden. If you have already set to work organizing and ordering your seeds for the season, you have started the very first stage of planning just by deciding what you want to grow. Depending on your gardening style, the coming months could involve plenty of preparation: organizing your tools and buying new ones, securing a source of nutrient-rich compost, starting and caring for your seedlings, and finally tilling and prepping your soil. One important step folks often skip is putting together a reliable garden plan on paper before a single seed goes in the ground.
Read: Seed Starting Basics – Here’s when and how to get your seeds growing indoors
Grab A Sheet of Paper!

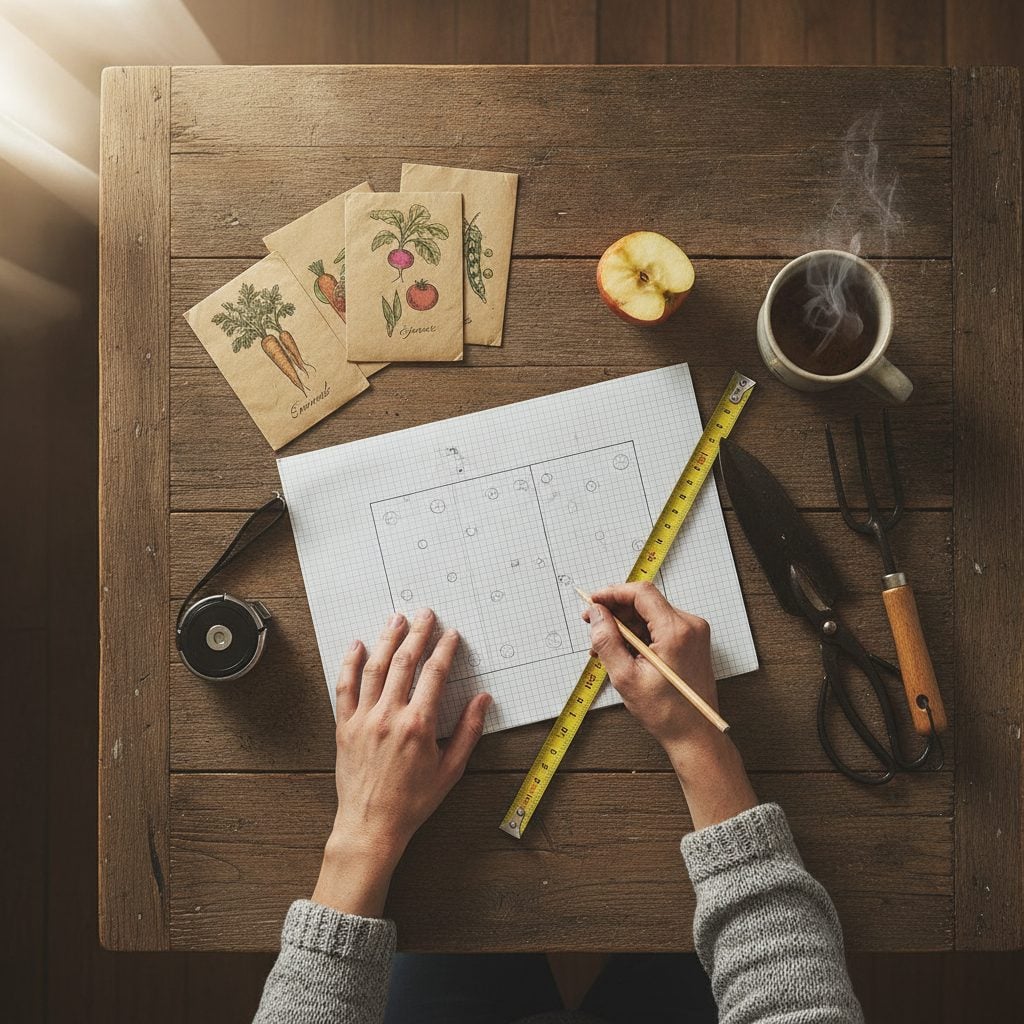
Designing your garden on paper ahead of time can make the difference between a well-organized, productive season and a chaotic one. You do not need anything fancy, just a sheet of paper. A plan lets you do the hard thinking at the kitchen table in January instead of standing over a seed flat in May wondering where everything goes.
Depending on the size and shape of your garden, there are several design approaches. You may have divided your garden into long rows in the past, or used block planting to squeeze out a higher yield. Before you start drawing, decide generally how you want your vegetables to grow. Your design will be based in part on your goals for the garden.
- Are you after the highest yield from the smallest space?
- Are you hoping to sell your vegetables, or to preserve and store them?
- Are you trying to keep weeds to a minimum?
- Or is your priority a good-looking garden, with less emphasis on production?
There is no wrong answer. Naming the goal first simply keeps every later decision, from bed width to spacing, pulling in the same direction.
Read: Companion Planting – Which Plants Grow Best Together?

Good Measure
Once you have settled on the size and shape of your garden, rows versus blocks, square raised beds versus circular, measure the dimensions of your growing area if you have not already. A simple spring-loaded tape measure will do the trick. Be sure to measure both the length and the width.
Next, recreate the shape of your growing space on a blank sheet. Graph paper is the ideal choice, because it lets you draw your garden to scale. Since spacing trips up so many gardeners, drawing to scale from the start helps you give each plant the room it needs once it is in the ground. A good rule of thumb is to let each square on the graph paper represent a 3″ by 3″ inch space in your garden. That means four squares by four squares, 16 squares total, represents one square foot in your garden. If your growing space is about 10′ long by 5′ wide, you will draw a box 40 squares long by 20 squares wide on your graph paper, representing a total of 800 square feet. For a very large plot, tape multiple sheets together, or pick up a larger drafter’s-size piece.
Once the outline is down, break your space into rows or beds on paper. A general recommendation is to keep rows no more than 3′ to 4′ wide, which is 12 to 16 graph paper squares. Walkways between beds or rows should be about 18″ to 24″ wide, roughly 5 to 8 squares. Rows and beds can be as long as you like. If you plan curved or circular beds, they are a little harder to draw to scale, but the squares still give you a sense of the square footage for each bed.
With your beds laid out, the next step is to “plant” your vegetables in the squares by drawing them in. To place them to scale, use your seed packet as a guide for proper spacing, or look up the recommended spacing for mature plants if you plan to buy seedlings. For example, a typical seed packet suggests planting tomatoes with 24″ to 36″ of space between plants in the same row, with rows 4″ to 5′ apart depending on the variety. On your graph paper, that means separating tomato plants in the same row by 8 to 12 squares, and keeping the rows about 16 squares apart.
Block-Style Gardening
Many gardeners like to plant in blocks, a method that increases yield and cuts down on weeding. Block-style gardening means planting your vegetables in rectangular blocks instead of long single rows, which trims the number of pathways and opens up more growing space. Vegetables go in with equal spacing in every direction, so you get the most out of a small footprint while crowding out the weeds. Block planting is also especially easy to draw to scale on graph paper.
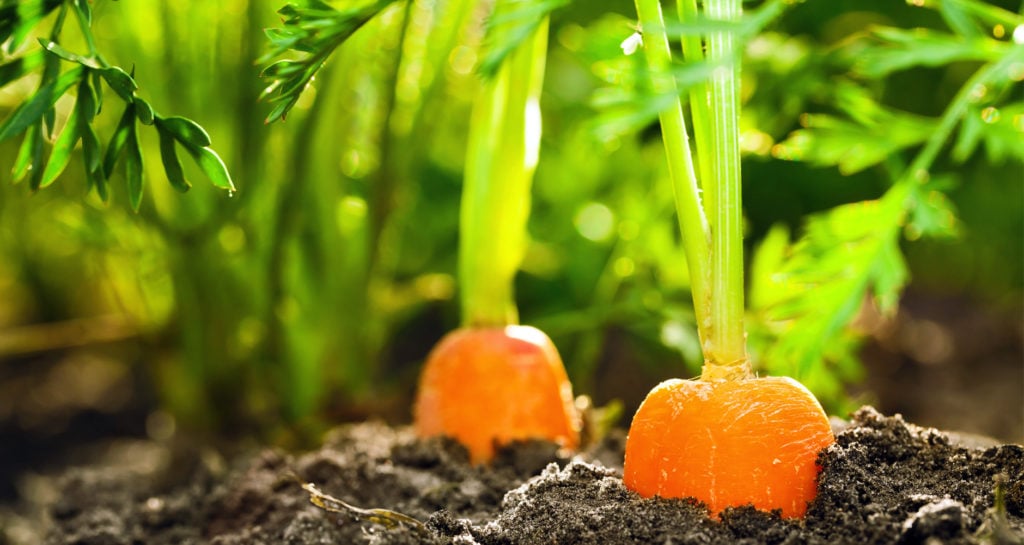
Say you plan a “block” of carrots that is 4′ wide by 1′ long, and your whole garden is 4′ wide by 20′ long. The recommendation for carrot spacing in blocks is 3″ in all directions. To depict that carrot block on your graph paper, place a small orange dot in the center of each square in a 16 x 4 square section, representing 64 carrots at about 3″ apart. Remember, each square represents 3″ by 3″. Now you know you need at least 64 carrot seeds for that block. You would do something similar for a “beet block,” placing a red dot every two squares, or 6″ apart, in every direction, as directed on your seed packet.
Crop Rotation
A few other things belong in your plan. Note how much sunlight each part of the garden gets through the day. Mark which vegetables you planted where last season, since crop rotation keeps your soil and plants healthy year to year. Think about which plants will grow tallest and whether they will shade out shorter neighbors, and factor in companion planting while you are at it.
This kind of design takes a little time and patience, but it lets you solve the spacing, seed, and seedling puzzles in an organized, visual way. The payoff is a garden plan that makes starting seedlings and planting the beds quick, easy, and reliable. Do not feel you have to follow this detailed method to the letter. Even a quick sketch on the back of an envelope will make a world of difference when it comes time to actually plant.
Read about Succession Planting
When to Start Planning by Region
Planning is a cold-weather chore, and that is the whole point. The best time to sit down with graph paper is the stretch of weeks before your last spring frost, while the ground is still too wet or too cold to work. Frost dates run weeks apart across the country, so the calendar shifts with your region, but the job is the same: get the plan finished before the soil is ready, not after. The Clemson Cooperative Extension has a plain-English guide to planning a garden if you want to confirm the timing and layout for your own ground.
| US Region | Best Time to Finish Your Garden Plan |
|---|---|
| Southeast & South Central | December into January, before an early spring planting |
| Southwest | Midwinter for a spring crop, again in midsummer where a fall garden fits |
| Northeast & New England | January into February, four to six weeks before starting seeds indoors |
| Great Lakes & Midwest | Late winter, while the ground is still frozen or too wet to work |
| North Central | February into March, ahead of a later spring thaw |
| Northwest | Late winter, timed to your seed-starting and transplant dates |
In Canada, gardeners in British Columbia and southern Ontario often plan through late winter, while the Prairies, Quebec, and the Maritimes have more time and finish their plans into early spring. Wherever you garden, the rule holds: the plan should be done before the soil is ready to work.
A Simple Garden Planning Checklist
If you would rather work from a list than a wall of prose, here is the whole process in order. Run down it once and your paper plan will hold together from the first square to the last seed.
- Name your main goal: yield, storage, fewer weeds, or good looks.
- Measure the length and width of your growing space with a tape measure.
- Draw the outline to scale on graph paper, one square to a 3″ by 3″ space.
- Block out beds up to 3′ to 4′ wide with 18″ to 24″ walkways between them.
- Pencil in each vegetable at its packet spacing, drawing rows and blocks to scale.
- Mark sun and shade, note last year’s planting spots, and rotate the families.
- Tally the seeds each block needs so your order matches your plan.
Keep the finished sketch somewhere handy, like the inside of a cupboard door or a garden notebook. Next winter it becomes your rotation record, telling you at a glance where the tomatoes and carrots grew this year so you can move them along.

Online Apps and Programs
If drawing by hand is not your style, a digital planner does the same job on a screen, snapping plants to a grid and handling the spacing math for you. Many gardeners keep one paper sketch and one app, using whichever is closer to hand. We love this drag-and-drop Kitchen Garden Planner by Gardeners.com. Whether you plan on paper or on a screen, the value is the same: you do the problem solving now, so planting day is quick, easy, and reliable.
Planning Your Garden: Frequently Asked Questions
When should I start to plan my garden?
Start now. Planning is a winter job, best done in the weeks before your last spring frost while the ground is still too cold or wet to work. Finishing your plan early means that the moment the soil is ready, you can move straight to planting instead of standing over a seed flat deciding where everything goes.
How do I draw a garden plan to scale?
Use graph paper and let each square represent a 3″ by 3″ space, so 16 squares make one square foot. Measure your plot, draw the outline to scale, then pencil in beds up to 3′ to 4′ wide with 18″ to 24″ walkways. Place each vegetable at its packet spacing, such as 24″ to 36″ between tomato plants.
What is block-style gardening?
Block-style gardening means planting vegetables in rectangular blocks with equal spacing in every direction, instead of long single rows. It cuts down on pathways, opens up more growing space, and crowds out weeds. A carrot block spaced 3″ in all directions, for instance, fits 64 carrots in a 16 x 4 square section of your graph paper.
Do I really need to plan on paper, or can I just plant?
You can plant without a plan, but a sketch saves you from crowding, wasted seed, and forgotten crop rotation. It does not have to be fancy. Even a quick outline on the back of an envelope will make planting day faster and more reliable than winging it bed by bed.
Why does crop rotation matter in a garden plan?
Moving each vegetable family to a new spot each year keeps soil-borne pests and diseases from building up, and helps balance the nutrients different crops draw from the soil. Marking last season’s spots on your plan makes rotation simple, since you can see at a glance where the tomatoes, carrots, and beets grew before.
Is a garden planning app better than paper?
Neither is better, they just suit different gardeners. A drag-and-drop app like the Kitchen Garden Planner handles the spacing math and snaps plants to a grid, while paper is free, needs no screen, and is easy to tack up in the shed. Many gardeners use both. Pick whichever gets your plan finished before planting time.

Sherie Blumenthal
Sherie Blumenthal is a Food Access Coordinator with Lots to Gardens, an urban gardening and community nutrition initiative sponsored by St. Mary’s Health System in Lewiston, Maine.
- Sherie Blumenthal

- Sherie Blumenthal
- Sherie Blumenthal
- Sherie Blumenthal


Can you plant centipede sod in south louisiana in late September?
This is a nice tool however I was using the digital planner on this site but I can no longer locate.
Any ideas?
I, too, had seen a digital planner that peaked my interest and when I went back to look into it more, it was gone. Then I realized that “Farmersalmanac.com” was different than “almanac.com” and I had been using both websites without realizing it. The Old Farmers Almanac at almanac.com has the digital planner. I don’t know if they are affiliated, although I tend to think they are competitors.
Hi Jaime,
We are in zone 7 – Oklahoma. So Onions can go in now but where do I find a planting guide for when to direct seed in this zone or start inside plants. My seed packs say 2-3 weeks before last frost, grow inside 8 weeks prior to last frost, etc.
myboots52,
I’m not clear on what you’re asking. Our Gardening By the Moon guide can be found here: https://www.farmersalmanac.com/calendar/gardening
Alternately, if you’re wondering when your average last frost date is, you can find that here: Average Frost Dates
trying to find out what one bussell of purple hull eyes yeild??
I use photoshop to do mine. That way I can make a layer for the garden’s physical layout, and then other layers for vegetables.
With the veggies on other layers, I can simply drag the layers around from year-to-year for crop rotation and companion planting. Works great – 3 years in a row now!
Hey everyone…
I think there are alot of misconceptions about onions… We plant ours in November every year. Yes it has been a bad and cold winter the past few years, but they always start coming up around Febuary. I live in Northeast Tennessee and the freezing temperatures in winter doesn’t seem to bother them during the winter… They will come up when it is time and you don’t really have to worry about them, not to mention we always get onions early and just replant when we pull them… Hope this helps someone out there, and helps with the confusion… By the way, we are in Zone 6…
when do u plant onion sets?