How To Clean Cast Iron Properly, Tips And Recipes
Do you have a cast-iron skillet you love? Be sure you're caring for it properly so that it will provide you with non-stick heaven for generations.
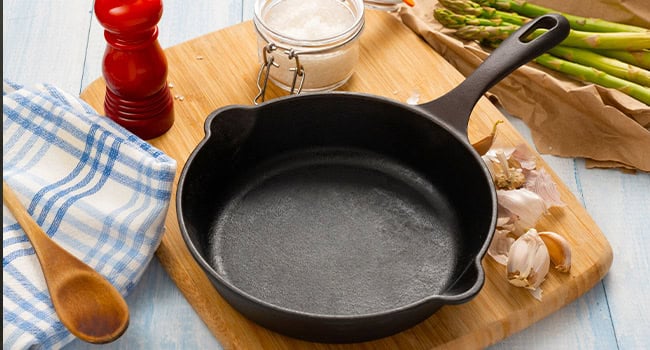
Learn the simple steps of looking after cast iron to make your favorite pots and pans last longer. Have you ever wondered what’s the right way to clean cast iron? These tough long-lasting pans are often passed down through generations and are actually easy to take care of (despite the rumors and fears that they are not). Here are some easy care instructions from the Farmers’ Almanac that will help keep your cast iron in great shape. These pans are cooking-friendly and can help you make all sorts of tasty dishes, the perfect cast iron steak and more. (Jump to the recipes). If you follow some basic cleaning advice, your cast iron will become a reliable companion in your kitchen.
How to Clean Cast Iron – 4 Essential Steps
How long your cast iron skillet lasts and how well it cooks can really depend on how well you clean it. Different types of cast iron, like regular cast iron, enameled cast iron, and hard nitriding cast iron, need to be cleaned in their own special ways because they have different features. Though each kind has its own needs, generally speaking, cleaning your cast iron skillets right way will help them last longer and work better. Here’s a simple guide to understand how to clean each one:
Regular Cast Iron
- Wash with warm water right after cooking: Once you’re done cooking, grab some warm water and a sponge and clean it right away. Make sure not to use cold water suddenly since it could make your pan bend or crack. If there’s some tough stuff left on the pan, a little bit of gentle soap is fine, but don’t use strong cleaners or dishwashers since they can take off the protective layer. Also, never leave your cast iron sitting in water because it will rust. (Rust can do more than just make your cast iron look less nice. It might also weaken the pan and lower how well it cooks. It can make the surface feel rough and hurt the special oil layer that stops food from sticking. Rust could also give your food a strange taste.)
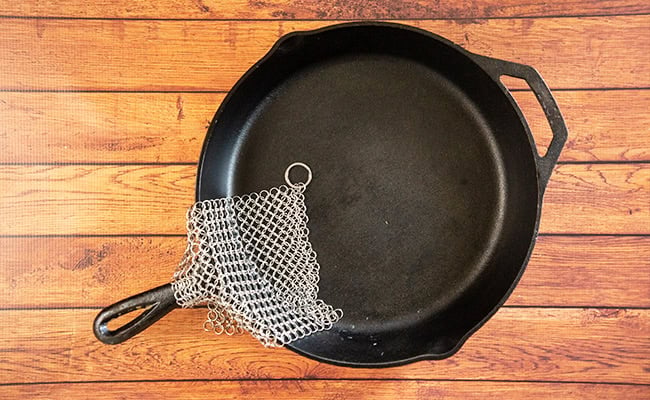
- Gently brush off any leftover food: Use a soft brush to gently get rid of any leftover bits of food. If you have some really stuck-on food, a mix of salt and water might help. You can use something like steel wool to get rid of rust, but don’t use scratchy things for regular cleaning so you don’t damage the pan’s special coating. However, chainmail scrubbers are acceptable. Jump to more information about this in our “Do’s And Don’ts” section.
- Make sure it’s completely dry: To stop rust from forming, dry your skillet really well after you wash it. You can use a clean towel or put it on the stove with some heat to make it dry faster before you put it away.
- Rub some oil on it: Just like putting lotion on dry skin, your skillet needs a bit of oil. Spread a light layer of oil on it after it’s dry. This helps keep it protected and strong. If your skillet isn’t shiny anymore and food sticks to it, it might be time to season it again with a small amount of oil and heat. Taking care of it regularly is important to keep your skillet ready for cooking anytime.
Enameled Cast Iron
Enameled cast iron has a special coating, often made of porcelain, that doesn’t rust. Enameled cast iron has a shiny and colorful coating. This coating is usually put on both the inside and outside of the pot or pan. (Check that the color looks the same all over.)
- You can wash it with a gentle soap and a soft sponge.
- Stay away from rough cleaners or scrubbers so you don’t scratch the coating. (Don’t use metal tools that could chip the coating.)
- Dry it well after cleaning.
- You don’t need to add any oil for protection.
Hard Nitriding Cast Iron
Hard nitriding cast iron is extra tough and doesn’t wear out easily. (Check for any details given by the company that made it. If your cast iron cookware is really good quality and has been treated to be extra tough, you might find this mentioned in the description, the instruction booklet, or on the box it came in.)
Jump to more facts about hard nitriding cast iron
- Clean it with hot water and a soft brush or cloth. You can use a mild soap if needed.
- Don’t use rough cleaning tools that might scratch the tough surface.
- Dry it quickly to prevent any moisture-related issues: reduced hardness, surface erosion, corrosion of the nitrided layer, etc.
- You might not have to oil it like you do with regular cast iron. Review the manufacturer’s recommendations, as the unique treatment might affect the need for additional oiling.
Note: It’s really important to follow the cleaning instructions that come from the company that made your cookware.
How To Resurface and Remove Rust from Cast Iron
Here’s how to bring your rusty cast iron back to life in 6 easy steps!
- Clean off the rust: First, brush off any loose rust with a hard plastic brush or a non-metal scraper. Be careful where you do this, as rust can leave marks. If the rust is really stuck on, you can use a scouring pad with a bit of dish soap and hot water. You can also make a paste with baking soda and vinegar and scrub that in.
- Salt and potato trick: You can also go for a natural method with some salt and a potato. Sprinkle some rough salt on the pan, then use a cut potato (with the cut side down) and rub it around in circles. The salt helps scrub the pan, and a few drops of oil can help get rid of the rust even better.
- Vinegar soak: If you want to quickly get rid of rust, soak the pan in a mix of vinegar and water. Just make sure not to leave it in too long, as it might damage the pan. Take the pan out as soon as the rust looks like it’s under control.
- High heat: If nothing else works, you can try using high heat. You can use your oven’s self-cleaning setting to burn the rust off. Put the pan upside down on the bottom rack and make sure there are no other pans around it that could get damaged. After it cools down, you can use a wire brush to scrub off any leftover rust.
- Final wash: Once you’ve removed the rust, wash the pan with soapy water without letting it soak. Make sure to avoid using too much water and wipe it down with a dry cloth to get rid of any leftover bits. To make sure it’s completely dry, put the pan on the stove on medium heat for about 5-8 minutes.
- Put the seasoning back: Because cleaning it will strip away the protective coating, you’ll need to season your cast iron pan again. This will help build up a new protective layer. Just follow the right steps to season it and you’ll have a pan that’s free from rust and ready to use.
Related: Rust Remedies: 6 Natural Ways to Remove Rust
Note: Some readers have asked us, “Why is my cast iron brown?” Well, if you recently cleaned and re-seasoned your cast iron skillet, it may have a bronze or brownish tint to it. Don’t worry, it isn’t rust. Each time you season your pan or cook in oil, the color will deepen, eventually becoming black through a process called carbonization. Caramelize some onions and your pan will be black in no time! (Cast irons are gray when they first come out of the mold, however most that you see on the market now are black because they have already been factory seasoned.)
Do’s and Don’ts
Make your time cooking with your cast iron skillet on the stove better with these simple suggestions:
Warm It Up: Start by heating your skillet on medium for 5-10 minutes before you cook. This helps your food cook evenly and not stick. You can check if it’s ready by feeling the heat with your hand above the skillet.
Use Oil: Your skillet needs oil to create its special non-stick layer. Put a good amount of oil in the skillet. Think of Southern cooks who use their skillets a lot and get them just right for making things like eggs that don’t stick.
Related: The Best Cooking Oils, 15 Kinds And Uses
Control the Heat: Get your cooking just right by managing the heat. Cast iron heats up slowly, so adjust the heat when you need to. This helps your food cook well and keeps the seasoning good.
Watch Out for Sour Foods: Cast iron can react with sour foods, and they can mix iron into your food. A skillet that’s well-seasoned can handle some sourness, but be careful with foods that might take off the seasoning. Consider avoiding tomatoes, citrus fruits, wine, and dairy products. (You may also line your pan with aluminum foil or create packets to take advantage of even heating but prevent certain foods from coming in direct contact with your cast iron.)
Related: 10 Tips For Grilling Fish
Don’t boil water: Boiling water in your skillet can harm the seasoning and lead to rust. If you’re adding wine to your cooking, use a skillet that’s already well-seasoned. Use your skillet to roast dry foods like nuts, tortillas, and flatbreads.
Clean Gently: When cleaning, use soft methods. Don’t use rough scrubbers or metal tools that can scratch the seasoning. A soft brush or cloth is best for regular cleaning to keep the skillet smooth. However, there is something called a “chainmail scrubber” that is perfectly safe for use with cast iron and does not destroy the pan’s seasoning layer.
Keep It Dry: Don’t let water sit in your skillet or put it in water. Water can make it rust and damage your skillet.
Be Careful with Steel Wool: Only use steel wool when you need to fix up an old skillet. Using it too often can scrape off the oil layers you’ve built up.
Take It Camping: Your skillet is great for cooking over a fire when you’re camping because it’s so tough. It’s also easy to clean with just a little water, making it perfect for cooking things like fish you’ve just caught.
Related: Easy Camping Meals That Wow!
Don’t Worry About Mistakes: If you make a mistake with your skillet, it’s okay. You can fix it by oiling it and heating it until it smokes. Cast iron is strong and can be fixed easily unless it has a crack, so it’s a forgiving tool in the kitchen.
Store with Care: When you put your skillet away, do it carefully to avoid damage. Put a paper towel or cloth between skillets if you stack them. Make sure they’re in a place with good air flow to keep moisture away and stop rust.
Use these tips with your cast iron and your cooking will get even better!
Storage Tips
After you’ve cleaned and dried your cast iron pans, make sure to put them away in a place that’s not wet or humid, and keep them away from the sink. If you put away your pans while they’re still wet, or if they’re in a moist place, they may start to rust.
To keep the oil coating safe, stack your pans with some paper towels between them. Hanging your pans can look nice in your kitchen, save space, and help stop rust by letting air move around them. Just make sure the hooks you hang them on are strong enough to hold the weight of the pans.
Some people like to keep their cast iron in the oven or on the stove so they can reach them easily.
What Can I Cook in My Cast Iron?
There’s a good reason the cast iron is the ultimate workhorse in many kitchens. From achieving the perfect sear on a steak to making delectable desserts, your cast-iron skillet is one tough, versatile vessel.
Cast iron heats up quickly and cooks evenly, retaining heat like non-other making it great for browning and caramelizing. It also goes from the stove top to the oven beautifully, making it a favorite for one-pan dishes. The possibilities are endless, but two of our favorite uses is for cooking cast iron steak and cast iron pizza:
The Perfect Cast Iron Steak
One of the most revered uses for a cast iron skillet is for cooking a steak. Cooking steak in a cast iron pan is ideal because cast iron heats very evenly and retains heat well. Follow these steps and you may second-guess using your grill:
- Let Steaks Warm Up: Take your steaks out of the fridge about 30-40 minutes before cooking so they can warm up to room temperature.
- Dry and Season: Dry off the steaks and season them well with salt and pepper.
- Heat the Skillet: Turn up the heat and warm up your skillet on high for about five minutes. You want it to be really hot, at least 400 degrees.
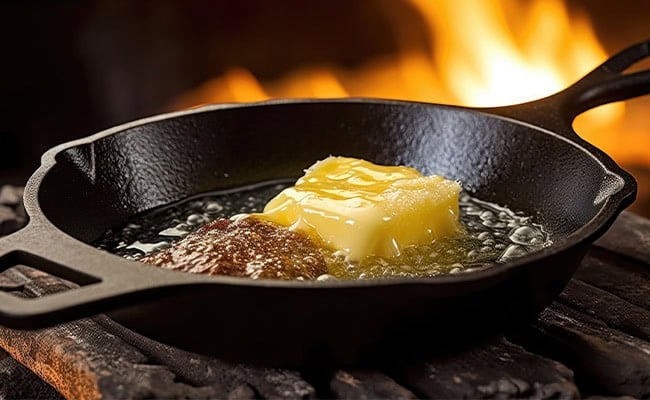
- Add Oil or Butter: When the skillet is hot, put in 1-2 tablespoons of oil or butter and make sure the whole bottom of the skillet is covered. For more taste, you can put garlic and herbs in the skillet too.
- Quick Flipping While Cooking: Put your seasoned steaks in the hot skillet and keep flipping them every 30 seconds. Keep doing this until the steak is about 5 degrees less than how cooked you want it. If the steaks are thick, you can start them on the skillet and then finish them in the oven.
- Let Steaks Rest: Take the steak off the skillet, cover it with foil, and let it sit for 5-10 minutes. Don’t cut it right away. This time lets the juices spread out so the steak will be juicy and tasty.
Cooking A Cast Iron Steak Like Chef Gordon Ramsay
Even Gordon Ramsay loves his skillet. Cook the perfect cast iron steak the Ramsay way (via chefgodonramsayrecipe.com):
Better Tasting Pizza
Looking for a delicious deep-dish pizza? Swap your pizza pan for your trusty cast iron skillet to get a perfectly golden crust and an enhanced overall taste!
- Place a cast iron skillet in the oven and preheat to 500 degrees.
- Shape the dough into a big, flat circle, about 14 inches across, wider than your cast iron skillet.
- Take the skillet out of the oven carefully and add a little oil, then put the dough into the skillet and press the dough against the sides.
- Put ½ cup of tomato sauce on the dough and spread it all the way to the edges. Don’t add too much sauce. Prolonged exposure to moisture can ruin the seasoning of your cast iron skillet, lead to rusting, and, worst of all, leave you with a soggy crust!
- Add pepperoni or whatever you like on top and then put slices of fresh mozzarella cheese over it (avoiding the edges). Don’t overload your pizza with excessive toppings. While cast iron skillets are robust, overcrowding can result in uneven cooking. Aim for a balanced distribution of toppings. Note: While dairy should be avoided generally with cast iron,
- Put a bit of olive oil on the parts of the dough that you can see.
- Cook it on the lower shelf of the oven until the edges look lightly browned, which should take about 12-14 minutes.
- After it’s cooked, add some pieces of fresh basil on top.
- Remove the pizza from the cast iron pan and place on a board.
- Cut it into pieces, let it cool for a few minutes, and it’s ready to eat!
- Most importantly: Clean your cast iron skillet immediately.
Take me to the top of this page to see “How To Clean Cast Iron” tips
Other Favorite Uses
- Dutch Baby: Part pancake, part pop-over, Dutch babies are a yummy, slightly sweet breakfast treat cooked right in your cast iron skillet: Take me to the Dutch Baby Pancake Recipe
- Cornbread: Cast iron gets really hot and can go from stovetop to oven, perfect getting a crispy bottom on your cornbread. Served with softened butter, or drizzled with honey, this skillet cornbread recipe is a must: Take me to the Cornbread Recipe (via Pioneerwoman)
What is Hard Nitriding Cast Iron?
While many people know about regular cast iron pans, the special kind called hard nitriding cast iron isn’t as well-known in cooking. Fans say that adding nitrogen to these pans makes them the best option for light cast iron. This process, often used in making things for factories, involves heating the pan and adding nitrogen to the surface, making the outside very hard.
Hard nitriding cast iron gives pans a lot of strength and helps them resist rust. People think nitriding cast iron pans are better than normal ones because they’re lighter (less than two pounds), they don’t scratch easily, and they’re naturally non-stick without needing any seasoning. These pans are made with safe materials, so they’re good for cooking.
Cookware shouldn’t be heavy or difficult to use. The many good points of nitriding cast iron have made it more popular, and some people prefer it over the usual cast iron. Although these pans aren’t found everywhere, you can buy them from special manufacturers, both online and in some cookware stores.
Have you ever tried a hard nitriding cast iron pan? We would love to hear your feedback and comparisons to traditional cast iron.
Join the Discussion
How old is your beloved skillet?
What are your tried-and-true tips for how to clean cast iron?
Have you ever made cast iron steak?
Share with your community here in the comments below!


Natalie LaVolpe
Natalie LaVolpe is a freelance writer and former special education teacher. She is dedicated to healthy living through body and mind. She currently resides on Long Island, New York, with her husband, children, and dog.
- Natalie LaVolpe

- Natalie LaVolpe
- Natalie LaVolpe
- Natalie LaVolpe