

Make Your Own Apple Cider Vinegar: A Fall Recipe From Kitchen Scraps
This easy DIY method uses your leftover fall apple cores and peelings to make an authentic batch of nature's best natural remedy.
Quick Reference
- Total time: about 6 weeks from apple scraps to finished vinegar.
- What you need: quart canning jar, muslin cloth or coffee filter, apple cores and peels, chlorine-free spring water.
- Sugar: optional; a quarter cup speeds fermentation but is not required.
- Best apples: organic, mold-free, rinsed under running water.
- The mother: the cloudy film on top after weeks 3 to 4; save it to start future batches.
- Safety note: homemade apple vinegar has unknown acidity, so the National Center for Home Food Preservation warns it is not safe for canning or pickling recipes that need a set 5 percent acid.
Fall is apple season, and every peeled apple leaves a small pile of cores and peels behind. Those scraps become homemade apple vinegar with three tools: a clean quart jar, a piece of muslin, and time. The finished vinegar goes into salad dressings, marinades, and the folk remedies the Almanac has printed for two centuries. A gallon jug of the store-bought kind runs about 6 dollars; a jar of your own costs only the scraps you were going to compost.
The benefits of apple cider vinegar stretch from kitchen zing to the natural remedies Almanac readers have swapped for generations. True commercial apple cider vinegar starts as pressed apple cider that is fermented twice, first into hard cider, then into vinegar. This scrap-fed version skips the pressed-cider stage and ferments water-plus-scraps straight into a mild, unfiltered vinegar. It is tangier than store-bought, cloudier, and carries its own live mother once the batch settles.
Apple vinegar can be made in large batches in a crock or a jug when you are peeling and coring bushels of apples. For your first attempt, a single quart jar keeps the risk small and the learning quick. Cornell University’s School of Integrative Plant Science notes that scrap-vinegar fermentation uses the same acetic-acid bacteria (Acetobacter) that turn wine and cider into vinegar on their own; a covered jar just gives them the airflow they need without letting fruit flies in.

Apple Vinegar Making Tips
- Use organic apples free of pesticides.
- Select fruit free of mold, fungi, or rot.
- Rinse fresh apples under running water.
- If you are using whole apples, soak them in a bowl of water along with a tablespoon of apple cider vinegar for five minutes before peeling. The apple cider vinegar serves as a fruit wash to kill bacteria and remove any fungicide or pesticide residue.
Supplies and Ingredients
- Quart canning jar
- Canning lid and ring
- Muslin cloth, or a clean, unused coffee filter.
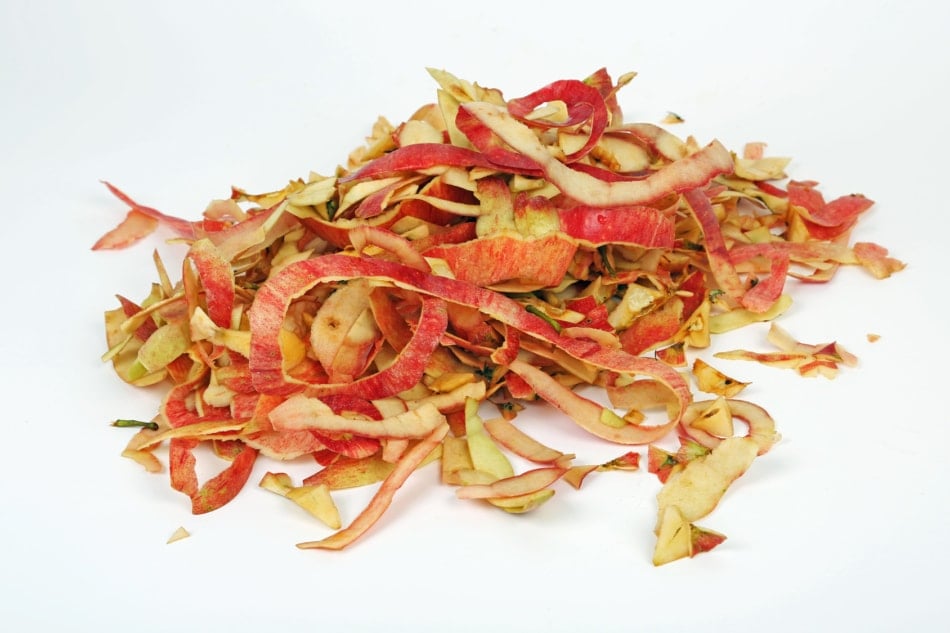
- Apple cores and peels
- Spring water
- Sugar (optional)
Instructions: Nine Steps From Scraps to Vinegar
Follow these steps in order. The active work totals about 15 minutes; the rest is patience while the acetic-acid bacteria do the fermenting.
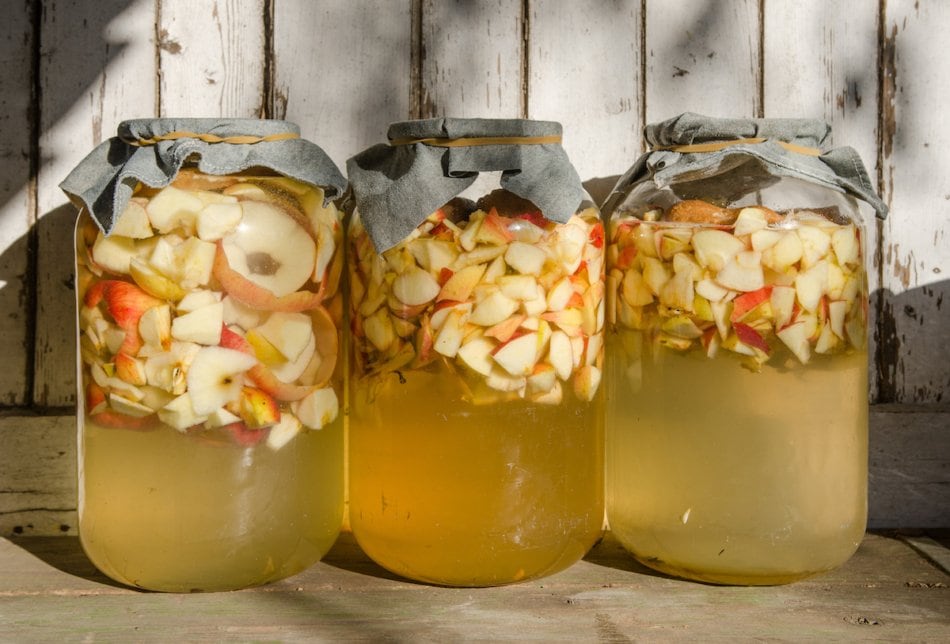
- Fill a sterilized quart jar with clean apple peels and cores, or add scraps over the course of several days from your snacking apples (be sure to cut away bitten areas). Add spring or filtered water, free of chlorine, until the scraps are completely covered.
- Optional: to speed up fermentation, add one quarter cup of sugar to the jar and stir. The sugar feeds the bacteria for a stronger, faster start.
- Cover the filled jar with a circle of muslin cloth or the coffee filter, then secure with a rubber band or the canning jar ring. This keeps fruit flies out and lets the mixture breathe.
- Place the jar out of direct sunlight, in a warm place near a hot-water heater, refrigerator, wood stove, or on top of the gas range (not directly on a burner). Warmth between 70 and 80 degrees Fahrenheit speeds fermentation.
- After a few days, the contents should start to thicken. The mixture will begin to foam and bubble as the yeast converts scrap sugars to alcohol.
- After two weeks, strain out the apple scraps and pour the liquid into a clean quart jar. Cover as you did before with muslin cloth and canning jar ring. Store on a pantry shelf.
- After a few weeks, the mixture should appear cloudy and a film will form on the surface. This is the mother, which can be used to start future batches of apple vinegar.
- At six weeks from the start, the fermentation process should be complete. There will be a residue inside the bottom of the jar and the vinegar will taste tangy. If the smell or taste is undeveloped, allow it to sit longer. Once the vinegar has developed, cap the jar with a lid and store in your pantry until needed.
- When you are ready to make another jar of vinegar, remove the mother and add it to a new batch of apple scraps and water. Repeat the process.
Note: This apple vinegar is different from a commercially fermented apple cider vinegar. Because it is difficult to know the exact strength of homemade apple vinegar, it is best not to use it in canning or pickling recipes where a high, set concentration of acid is required.
The 6-Week Fermentation Timeline, Week by Week
Home cooks often lose track of how the batch should look and smell as it works. Here is what to watch for each week so you know the batch is on track.
Kitchen Temperature Notes By Region
Fermentation speed depends on the ambient temperature around the jar. USDA data shows the fastest, most consistent apple-vinegar batches sit between 70 and 80 degrees Fahrenheit.
- USDA Zones 3-5 (Upper Midwest, New England, Prairies): a cold winter kitchen can dip to 60 degrees Fahrenheit. Set the jar on top of the refrigerator or beside a woodstove; do not put it in an unheated pantry.
- Zones 6-7 (Mid-Atlantic, Ohio Valley, Pacific Northwest): room temperature is close to ideal. A shelf away from direct sun works nine months of the year.
- Zones 8-10 (Southeast, Texas, coastal California, Southwest): a hot summer kitchen may push fermentation past 85 degrees Fahrenheit, at which point the yeast dies off. Move the jar to the coolest indoor spot in July and August.
- Canada (Zones 2-8): winter kitchens can be cold enough to stall the ferment for a week. Wrap the jar in a tea towel and set it inside a picnic cooler beside a heat register.
How To Use Your Homemade Apple Vinegar
Now you have a homemade batch of nature’s best natural remedy! The finished vinegar tastes brighter and softer than the commercial kind. It is a workhorse in the kitchen and the medicine cabinet.
- Salad dressing: equal parts homemade vinegar and olive oil, a pinch of salt, a spoon of honey.
- Marinade: a quarter cup vinegar per pound of chicken or pork tenderizes overnight.
- Fruit wash: one tablespoon per bowl of water to rinse fresh apples, berries, or lettuce.
- Hair rinse: two tablespoons per cup of water; folk practice since the 1800s for shine.
- Ice-cream topper for grilled peaches: reduce a half cup with brown sugar to a glaze.
- Starter culture: save the mother in a jar with a splash of vinegar to skip week one of the next batch.
Related Almanac Articles
Apple Cider Vinegar Uses and Recipes
Natural Cures With Apple Cider Vinegar

Frequently Asked Questions
How long does it take to make apple cider vinegar at home?
Six weeks from scraps to finished vinegar. The first two weeks ferment sugars into alcohol; the next four weeks convert alcohol into acetic acid. Warmer kitchens finish faster; a cold pantry can add a week.
Do I need to add sugar?
No. Sugar is optional. A quarter cup of sugar per quart speeds fermentation and makes a slightly stronger vinegar, but a plain scrap-and-water batch works too, especially with sweet apples like Fuji or Honeycrisp.
Is homemade apple vinegar safe to use for canning?
No. Home-fermented apple vinegar has an unknown acidity, and the National Center for Home Food Preservation is clear that canning and pickling recipes require a set 5 percent acid. Use commercial vinegar for canning; use your homemade batch for dressings, marinades, remedies, and cooking.
What is the mother, and is it safe?
The mother is a jelly-like disc of acetic-acid bacteria and cellulose that forms on top of the batch around week 3. It is safe, edible (though usually strained out), and reusable as a starter for future batches.
Why does my batch smell like nail polish remover?
That is the acetone note you get when fermentation stalls in the middle stage. It usually means the kitchen is too cold or the jar is not getting enough air. Move to a warmer spot, replace the muslin cover, and wait another week.
Can I use any variety of apple?
Yes, though sweet varieties like Fuji, Gala, Honeycrisp, and McIntosh ferment fastest because they carry more sugar. Tart apples like Granny Smith work but take an extra week. Mix varieties for depth.
How should I store the finished vinegar?
Cap the finished jar and store on a pantry shelf away from direct sun. Unlike commercial vinegar, homemade batches keep improving in flavor for months. Discard any batch with fuzzy black or pink mold on top.
Can I make it with apple juice instead of scraps?
Yes, and it goes faster. A quart of unfiltered, unpasteurized apple juice fermented the same way finishes in 4 weeks instead of 6, and the flavor is deeper. Pasteurized juice will not work; the pasteurization kills the wild yeast.


Deborah Tukua
Deborah Tukua is a natural living, healthy lifestyle writer and author of 7 non-fiction books, including Pearls of Garden Wisdom: Time-Saving Tips and Techniques from a Country Home, Pearls of Country Wisdom: Hints from a Small Town on Keeping Garden and Home, and Naturally Sweet Blender Treats. Tukua has been a writer for the Farmers' Almanac since 2004.
- Deborah Tukua
- Deborah Tukua

- Deborah Tukua
- Deborah Tukua


I am making my first batch of apple cider vinegar. I followed all of your guidelines. When I went to get it out of the pantry to stir it this evening it had bubbled over. Is this normal?
Hello! My ACV has reached a total of 6 weeks old. I dont see a mother formed on top, just sediment at the bottom of the jar. The vinegar is cloudy and sort of has a nutty after taste. There is no mould, it smells great. I am concerned with the nutty after taste, is this normal?
I’m curious if I have made a mistake. At the surface of my jars, I have mold forming. They are organic apple scraps, I froze them fresh and began the steps by just adding the frozen apples to my jars. Not sure if I should toss the whole thing because of the surface mold. I did just try to remove the molded pieces and am monitoring.
It depends on the color of the mold. If it was a white, yeast looking mold, you can scoop out and continue on if you wish. If you do see fuzzy, blue, black or pink mold on the surface of your apple scrap vinegar, discard and start over with fresh ingredients and clean equipment. You also should be sure not to use chlorinated water, as it could kill the microbes that are needed to ferment the apples. You can leave tap water sitting out for a few days to allow the chlorine to evaporate.
May I use distilled water, purified water or maybe a regular bottle of water such as aqua fina/pure life etc.?
Thank you.
I made ACV almost 8weeks already but still its not tasted vinegar why pls reply thanks
If there a way that I can just use my tap water? I don’t know if it’s chlorinated or not. Perhaps I can boil it first?
Brief and explicit enough, thanks
Glad you enjoyed it, Ruthie.
My “mother” keeps turning black. It resembles mold. Is there a way to avoid this? Thanks
I know everyone is saying use scraps but can I just use the whole apple or cored apple? The seeds have arsenic in them, is it better if I take them out before I start the process or strain them out at the end? Will the arsenic get into my vinegar during the process?
Thank you
Laura, we haven’t had this problem. But you can use whole apples if you don’t want seeds in it.
Hi Kris, any container, as long as it’s glass.
Laura: yes you can use the whole apple. The seeds aren’t a problem.
As my cut apples covered in water for the past 3 weeks, the mixture is very cloudy and smells very sour! Have I ruined it????!I’m not sure if I have done something wrong. I did add some frozen scraps to the cut fresh organic apples to make my batch of ACV.
Your answer would be greatly appreciated!